Changing LAN settings on the Asset Gateway
The following describes how to change your local area network (LAN) configuration on the Asset Gateway.
If you do not want to change the LAN settings or if you are using a different gateway hardware that doesn't allow changing of the LAN settings using the Workbench, continue with the next task: Connecting to the cellular network
- From the Workbench left pane, select and then
expand the Asset Gateway node.
Select Administration.
The Administration window appears.
- Click the Network
Configuration tab.
If there is no Network Configuration tab displayed, then the gateway hardware does not support changing the LAN configuration using the Workbench. Continue with the next task: Connecting to the cellular network.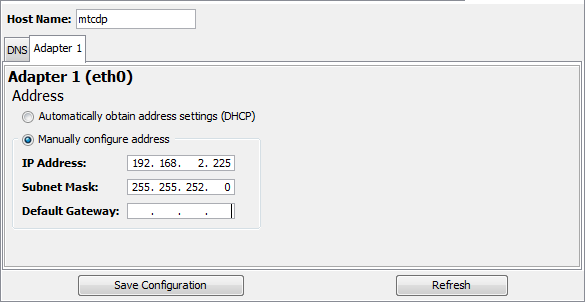
- If necessary, set the host name using
the Host Name parameter.
Select the DNS tab. You can add any DNS servers you want. If you are not sure what to set, use 4.2.2.1 and 4.2.2.2 as DNS servers. - Click the Adapter 1 tab.
- To use DHCP, select Automatically obtain address settings.
To specify a fixed IP address, select Manually configure address.
Parameter
Description
IP Address
Enter the new IP address for the Asset Gateway.
Subnet Mask
Enter the new netmask for the Asset Gateway.
Default Gateway
Enter the default network gateway for the Asset Gateway.
If you want to use a cellular connection to connect to the M2M Service, leave the Default Gateway parameter blank.
- If you selected DHCP for the
device, then you will need to find the IP address
either by talking to your IT staff or through some
other means.
- Select Save Configuration to apply
your changes.
- Next, you must re-scan for your Asset
Gateway.
From the Workbench left pane, right-click the Nodes icon, and then select Scan. - Select the Network icon for a
network scan, then select Address / Host
Name, enter the new IP address of your Asset
Gateway, and then select Scan.
The Asset Gateway will re-appear in the Nodes list using its new IP address.