Module Part 4 - Sending data from a module to the deviceWISE Cloud
This part will walk you through sending data from your module to the deviceWISE Cloud. You will explore sending properties, alarms, log messages, and attributes to the portal by the end of this section.
Prerequisites
The following is assumed:
- You have a web browser and Internet connection.
- You have an account on the Management Portal.
- You have a Telit 910 module that supports the deviceWISE Cloud API.
- You understand how to connect to your module and execute AT commands.
- You are familiar with the Telit AT Terminal application.
- Your module is connected to the deviceWISE Cloud and registered as a thing.
Sending property data
Most IoT applications include the capture of time-series sensor data, in the deviceWISE Cloud, this data is represented as a property.
- Execute the following AT commands:
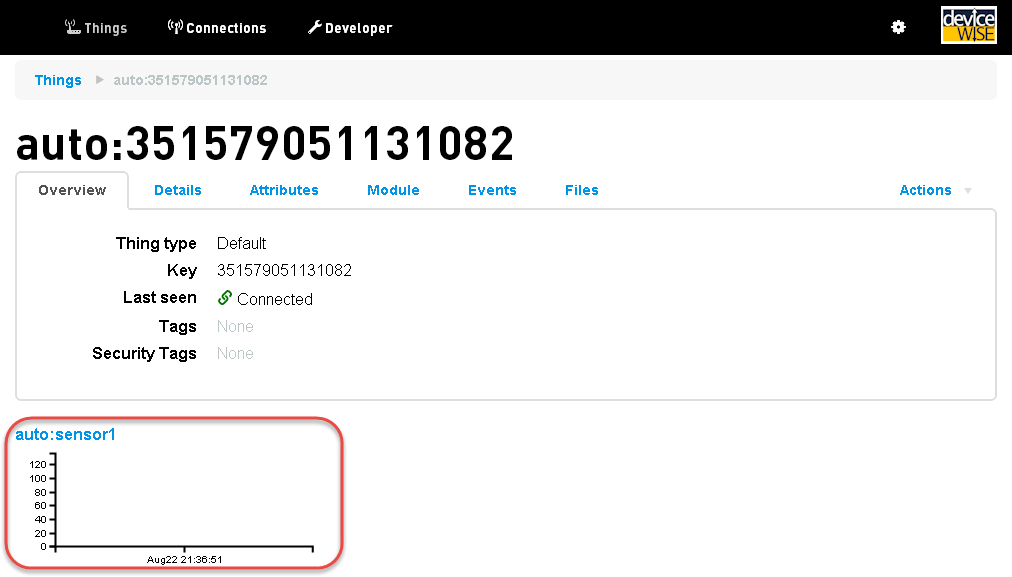
## Publish a property called "sensor1" with a value of 123. AT#DWSEND=0,property.publish,key,sensor1,value,123 #DWSEND: 3 OK ## Wait for a #DWRING notification to indicate we have a reply to our API call. #DWRING: 1,3,2 ## Execute AT#DWRCV command to check the reply, note the "3" matches the return from the #DWSEND command above. ## The "0" (second parameter in the response) indicates a success. AT#DWRCV=3 OK #DWDATA: 3,0,2,OK - Check the Thing page on the Management Portal (the
final page from Part 3 of this guide), and you will see
a graph showing your sensor value.
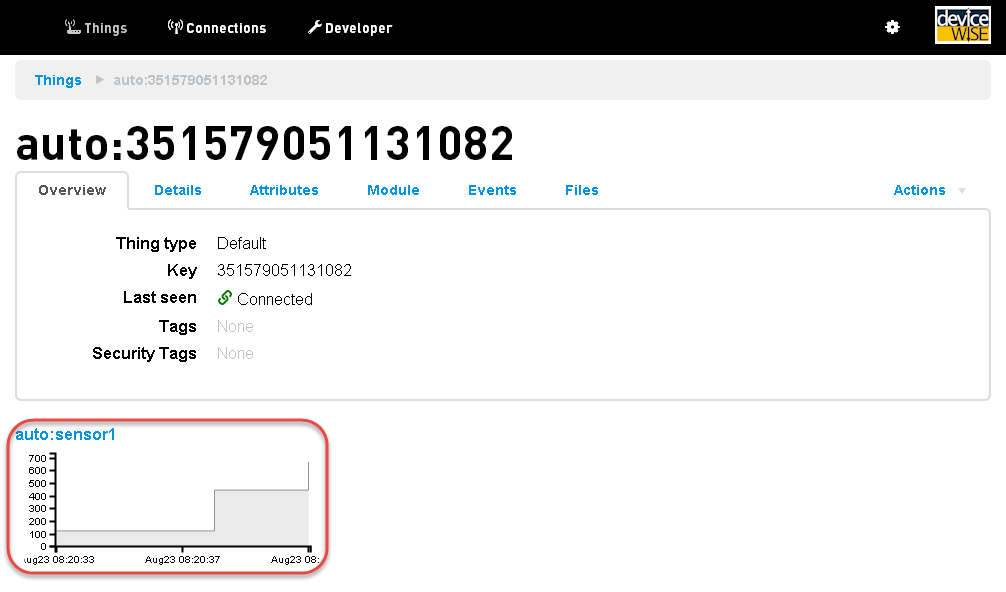
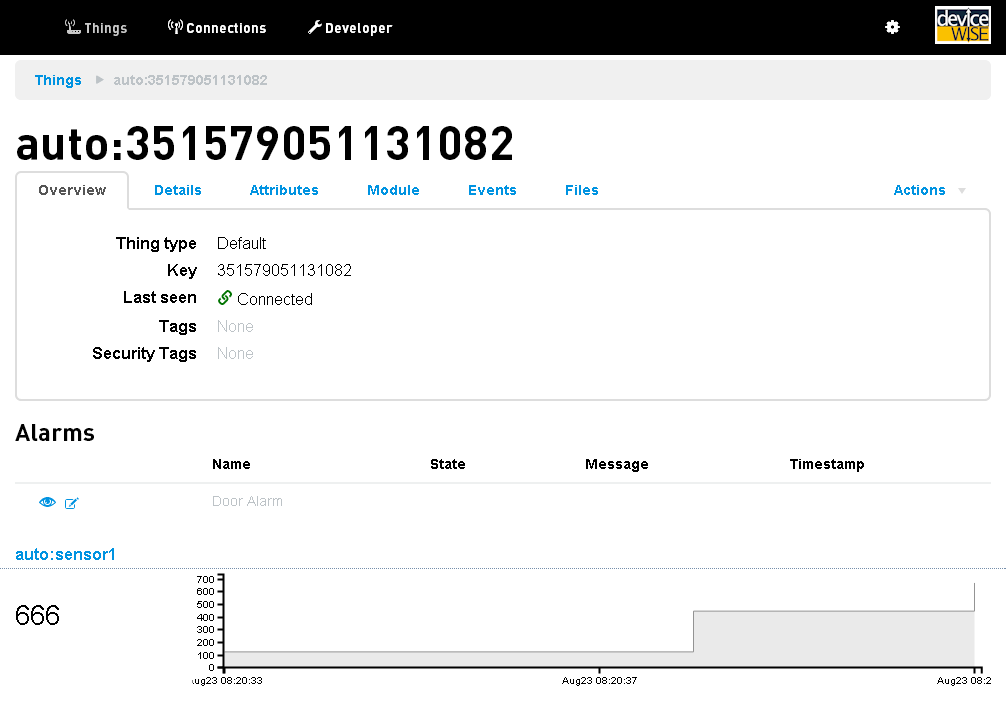
At this point, the graph is only showing a single data point, lets add a few more data points so we can get a more interesting graph. - Execute the following AT commands:This will submit two additional values of 444 and 666 to the "sensor1" property.
AT#DWSEND=0,property.publish,key,sensor1,value,444 #DWSEND: 4 OK #DWRING: 1,4,2 AT#DWRCV=4 OK #DWDATA: 4,0,2,OK AT#DWSEND=0,property.publish,key,sensor1,value,666 #DWSEND: 5 OK #DWRING: 1,5,2 AT#DWRCV=5 OK #DWDATA: 5,0,2,OK - Refresh the thing details page in the Management
Portal to see the additional data points.
Changing the property graph
Now that you can see the data, it would be nice to make the graph larger and easier to read, to do this you will modify the thing definition that defines the characteristics for its things.
- Select the Edit definition icon
next to the Thing definition field on
the Overview tab.
The thing definition page for this thing is displayed. - Select the Presentation tab to
change the view parameters for the definition.
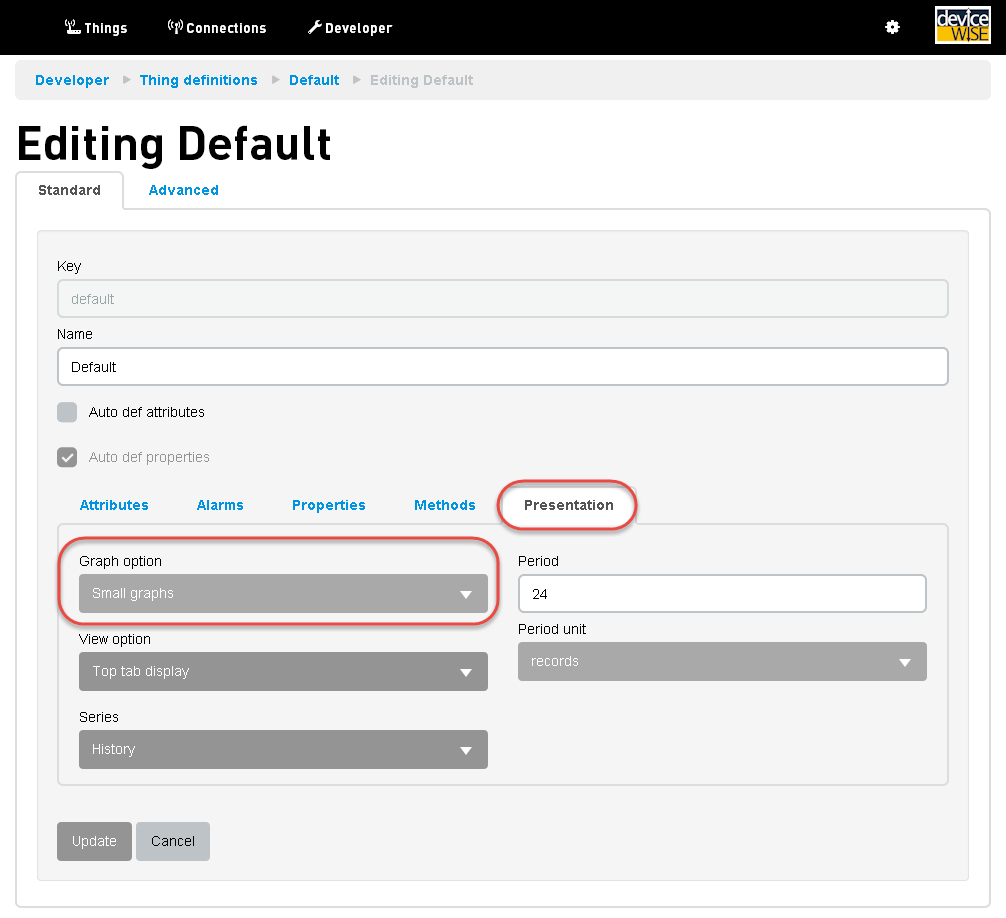
- Change the Graph option from
"Small graphs" to "Large graphs".
- Select the Update button at the
bottom of the form to update the definition.
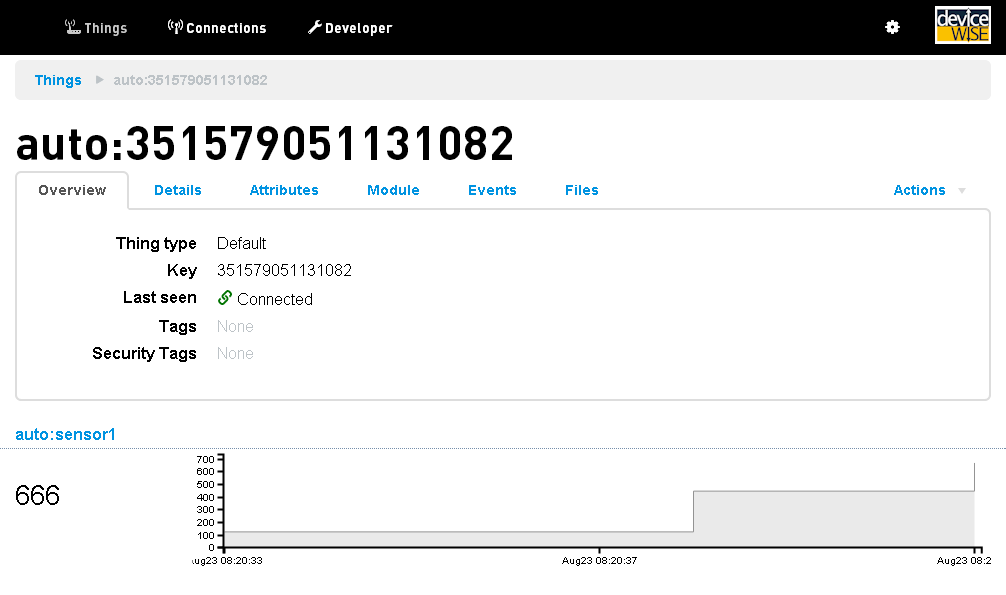
- Your thing's Overview tab should now look similar
to this:
Publishing alarm data
Alarms are special data points that are represented by a state instead of a value. Alarms are commonly used to represent a value that has a set of distinct states, such as on/off, open/closed, or full/empty.
Configuring the alarm
Unlike properties, alarms cannot be automatically defined, so before we can publish alarm data we must define the alarm in the thing definition.
- Select the Edit definition icon
next to the Thing definition field on
the Overview tab.
The thing definition page for this thing is displayed. - Select the Alarms tab to change
the view parameters for the definition.
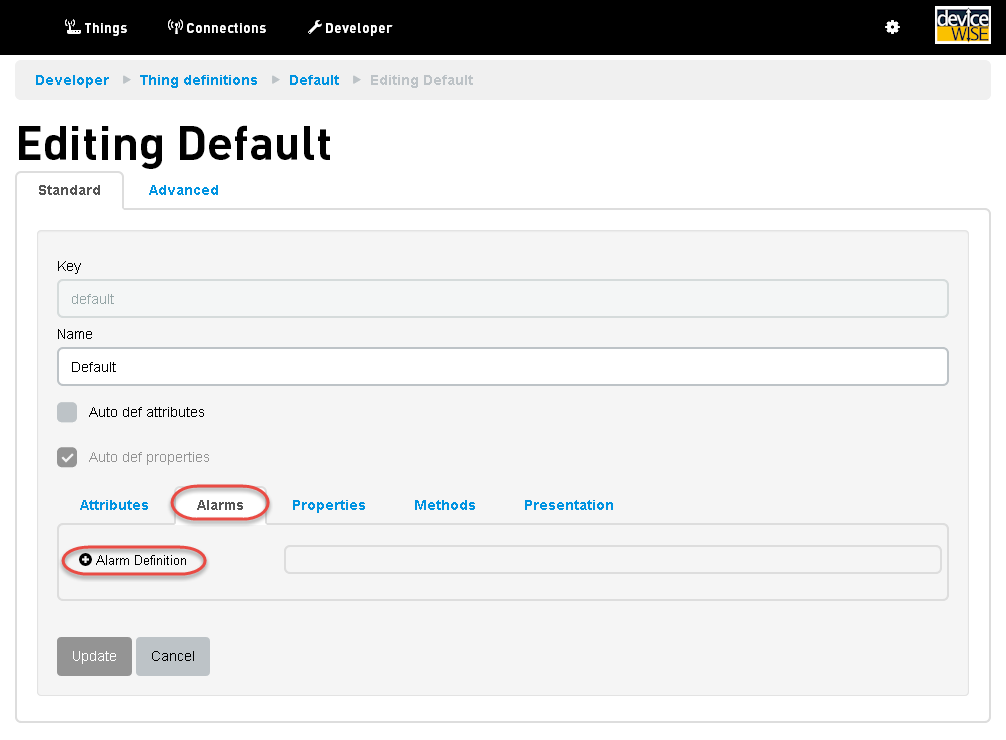
- Select the Alarm Definition button
to add a new alarm definition.
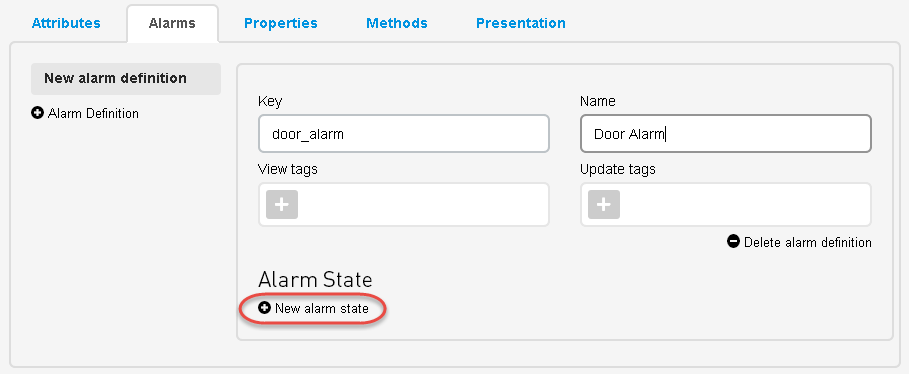
- Enter "door_alarm" for the Key,
and "Door Alarm" for the Name
fields.
- Select the New alarm state button
twice to add two alarm states.
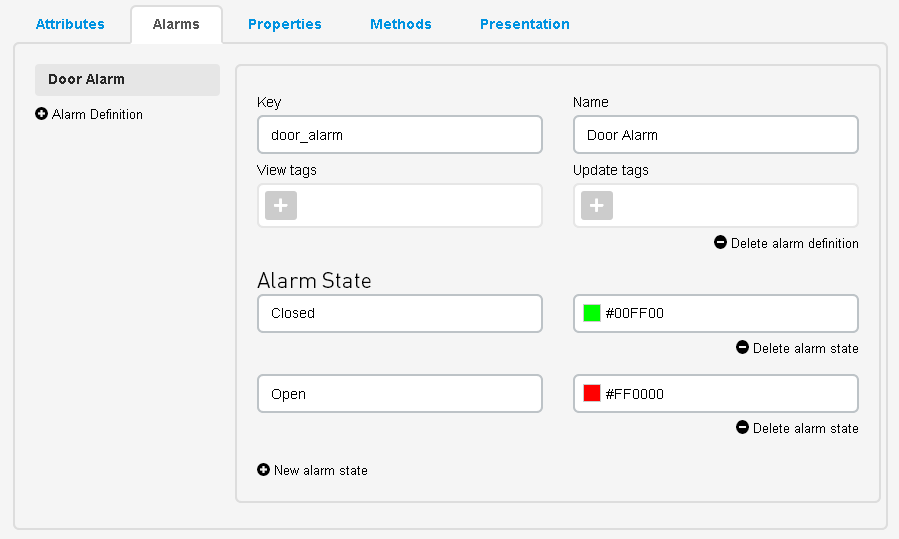
- Now you will add the different states for the
alarm, you can have an unlimited number of states. In
this case we have a door alarm, so the states will be
Open and Closed. We also can pick colors to use when
displaying information about the states.
- Set the two new states to Closed
and Open, pick any colors you want for
the configuration.
- Your configuration should look similar to
this:
Note: When using the API, the states are passed as integers, so the first state is state 0, the second state is state 1, and so-on. - Select the Update button to save
your changes.
- On the thing's Overview tab you will now see the
uninitialized alarm.
- You are now ready to set the alarm from the module.
Publishing alarm data
Now its time to go back to the Telit AT Terminal to publish your first alarm.
- Execute the following AT commands:
## Publish an alarm called "door_alarm" with a state of 0. AT#DWSEND=0,alarm.publish,key,door_alarm,state,0 #DWSEND: 7 OK ## Wait for a #DWRING notification to indicate we have a reply to our API call. #DWRING: 1,7,2 ## Execute AT#DWRCV command to check the reply, note the "7" matches the return from the #DWSEND command above. ## The "0" (second parameter in the response) indicates a success. AT#DWRCV=7 OK #DWDATA: 7,0,2,OK - Refresh the thing details page in your web browser
and you will see the new alarm state:

- To set the state to open, execute the following
AT commands:
## Publish an alarm called "door_alarm" with a state of 1. AT#DWSEND=0,alarm.publish,key,door_alarm,state,1 #DWSEND: 8 OK ## Wait for a #DWRING notification to indicate we have a reply to our API call. #DWRING: 1,8,2 ## Execute AT#DWRCV command to check the reply, note the "8" matches the return from the #DWSEND command above. ## The "0" (second parameter in the response) indicates a success. AT#DWRCV=8 OK #DWDATA: 8,0,2,OK - And again, refresh the thing details page in your
web browser to see the updated state:

- And just that easily you have now published alarm data to the deviceWISE Cloud.
You have completed Part 4
Continue with Module Part 5 - Sending data from the deviceWISE Cloud to a module.