This procedure describes how to create a software update package in the Workbench for deployment to one or more gateways. The update package bundles selected files, configuration resources and installation actions into a single distributable file.
- From the Workbench left pane, select the gateway
you want to be the source of the software update
package creation.
Make sure the source and the destination gateways are of the same platform type to ensure the package files are compatible. For example, the Write Core DB and Write Master DB actions will each update a database on the destination gateway. Those databases has platform specific content.
- Right click on the source gateway. The shortcut menu appears.

- Click Prepare Update Package. As a part of the Prepare Update Package wizard, Local directory screen appears.
- Choose the Local directory for packaging.

The local directory is the folder where all files that will be included in the software update package (package) are placed. Removing unused files from the local directory will reduce the size of the package file, which is important for the data transmission cost and transfer time when connected using a cellular connection.
- Click Next. The Create screen appears.
- Do one of the following on the Create screen.
- Select Create using selected
directory to create a new package file. You will
be asked for a file name later in the set of creation
steps.
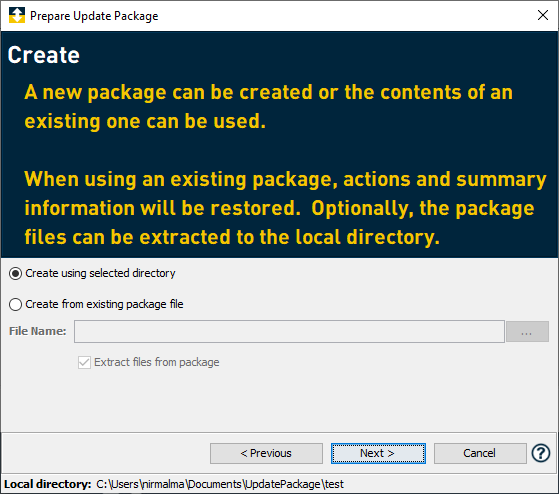
- Select Create from existing
package to create a package using the contents
of an existing package.
- The contents of the existing package will be used to configure the new package. This will include actions and package names (Step 5: Actions and Step 6: Package Summary).
- Select the Extract files from package option to extract the files from the package and write them to the local folder specified in the Step 1: Local directory.
- Select Create using selected
directory to create a new package file. You will
be asked for a file name later in the set of creation
steps.
- Click Next. The File Resources screen appears.
- Select any directories (and their sub-directories and
files) or individual files in the gateway's Staging Browser
area that you want to include in the package.
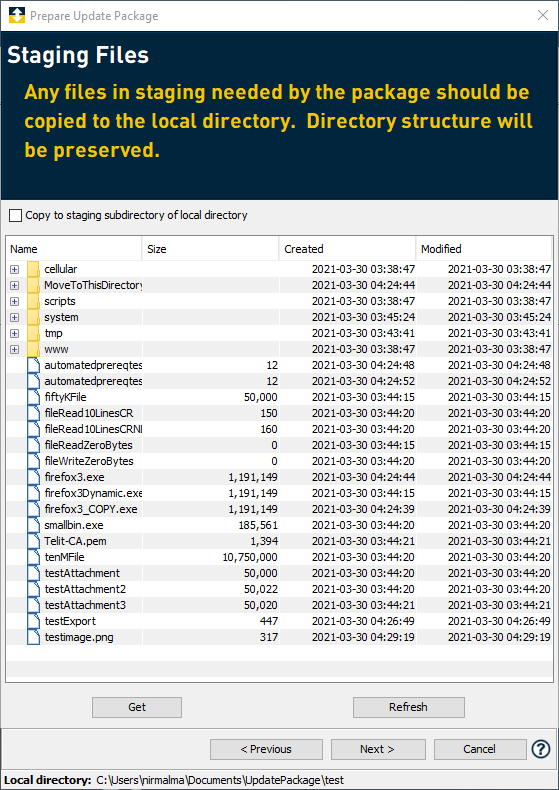
The File Resources screen allows you to select any directories (and their sub-directories and files) or individual files in the gateway's Staging Browser area that you want to include in the package. -
- Select the files you want to copy.
- If needed, select the Copy to staging
subdirectory of local directory
checkbox.
- If selected, the retrieved directories and files
will maintain the staging directory in their
path.
This maintaining of the staging directory path needs to be understood when using the Add Directory from Package action or Add Directory from Package to Staging action in the package. - If not selected, the retrieved directories and files
will not maintain the staging directory in
their path. This is the default option and will be used in
most cases.
- If selected, the retrieved directories and files
will maintain the staging directory in their
path.
- In the file listing, after selecting the directories or files click Get.
A message asks you to confirm the file(s) to get. -
Click Yes.
A message appears with the info that one or more files were saved to the local directory folder specified in Local directory - Click OK.
- If you are going to use the Write Core DB or Write Master DB
actions and have not exported the database, press the Export configuration database button
to export the configuration database to the local package directory.
- Select the files you want to copy.
- Click Next. The Action screen appears.
- Choose the actions to perform upon package installation.
The Actions screen allows you to add actions (similar to commands) that will be executed on the gateway.
The package actions you define may have operating system or deviceWISE product specific files or parameters. The design of the package file and its use on multiple gateways must take into account the operating system and deviceWISE product specific characteristics of the gateways.
To add an action:- From the bottom of the Actions
screen, click Add. The New Action
window appears.
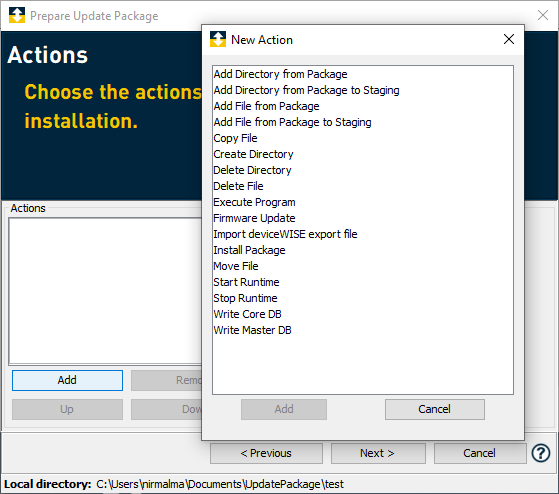
The New Action window lists the available actions. Actions can be added, removed, or reordered by using the buttons at the bottom of the Actions screen. - Select an action, and then click Add.

The Actions section accommodates the actions you added. The Details pane is where the specifics of the currently selected action are defined.
The list of actions and their parameters can be found on the Software update package actions page.
It is recommended that you add the Stop Runtime action as the first action and the Start Runtime action as the final action for many packages, based on the actions included. This is not required, but many changes (code, properties files, Master DB or Core DB) will not take affect without restarting the deviceWISE runtime on the gateway.
- From the bottom of the Actions
screen, click Add. The New Action
window appears.
- After you have added and ordered the actions you want in the package, click Next. The Package Summary window appears.
- Enter the package description. The Package Summary screen allows you
to specify the various attribute of the package file. Name, Version, Type, and Output file are required.
Type allows you to specify a custom label which will appear in the package list in the workbench.
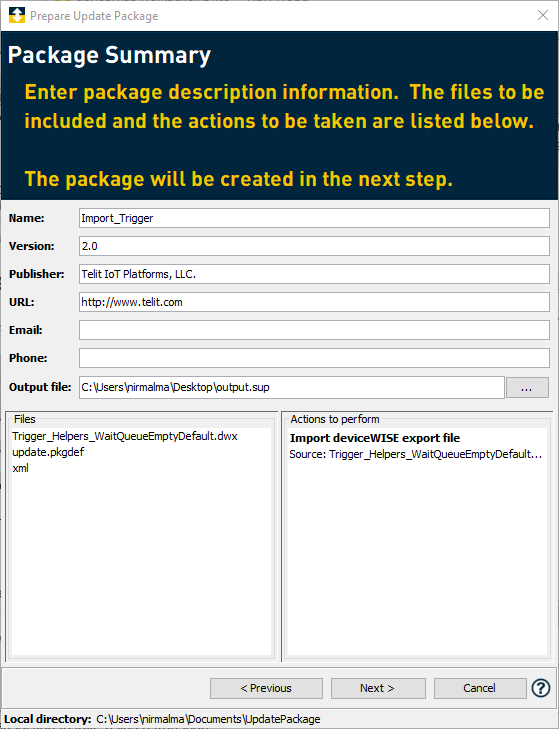
The lower portion of the Package Summary screen displays the files and actions that are included in the package. It is a good practice to update (increment) the Version number with each modification you make to the package. The package output file can be specified to be in any directory on the Workbench computer, but you should not chose the same directory being used as the Local Directory.The local directory should only contain source files that will be included in generated package file. Since you can create new package files and reuse the local directory, care should be taken to keep extraneous files out of your package local directory. - To create the package output file, click Next. The Processing Update Package screen
appears. The Processing Update Package screen
shows the package being created. The details of the creation are listed under the
Packaging build output section.
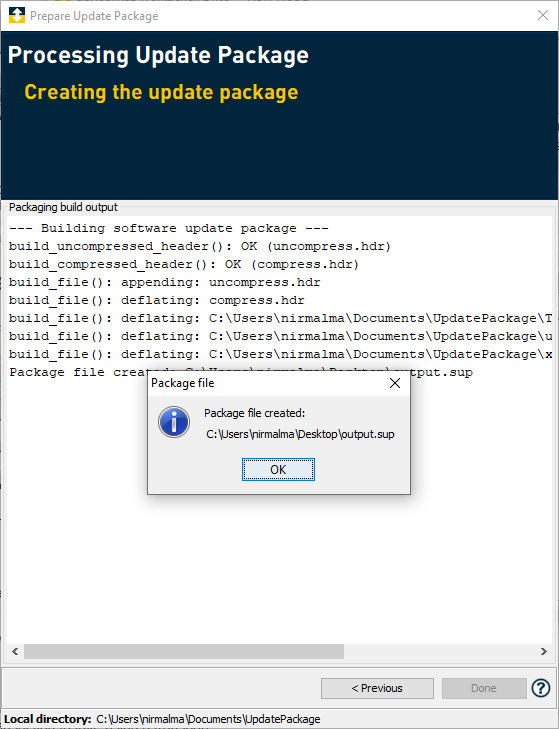
A message appears when the package output file is successfully created. - Click OK, and then
click Done. The file is located in the folder you specified in the
Output file parameter. If any errors occur, a message will appear and you will be able to return to the previous window to correct the errors.
If you are unable to resolve your errors all your files will be retained in the local directory specified in Local directory.
For more information, see: Database Deployment. The configuration database includes all defined items on the gateway such as projects and triggers, transports, transport maps, and devices.
After you have successfully created a software update package, it can be uploaded to the IoT Portal and deployed to your gateways. For information on these topics, see Software update package processing.