The System monitor will be used to describe how deviceWISE will send data to the MindSphere. It is a package that comes along with deviceWISE and measures the vitals of your machine such as CPU, Memory, and Disk usage. Install the System monitor package before starting this section. For more information on installing the System monitor package, see Packages. To setup deviceWISE to send Time Series Data, do the following:
- Open the Workbench
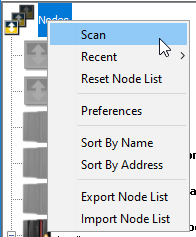
- Right click on Nodes and then Click Scan
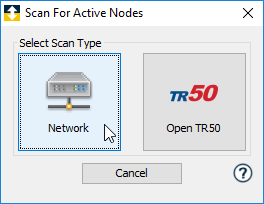
Scan For Active Nodes appears - Click Network
Scan For Active Nodes appears with the options to select Network - Select Address/Host Name and enter localhost or 127.0.0.1
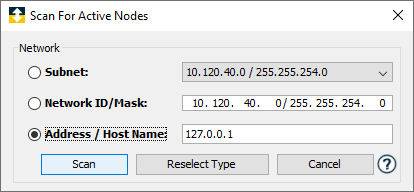
- Click Scan
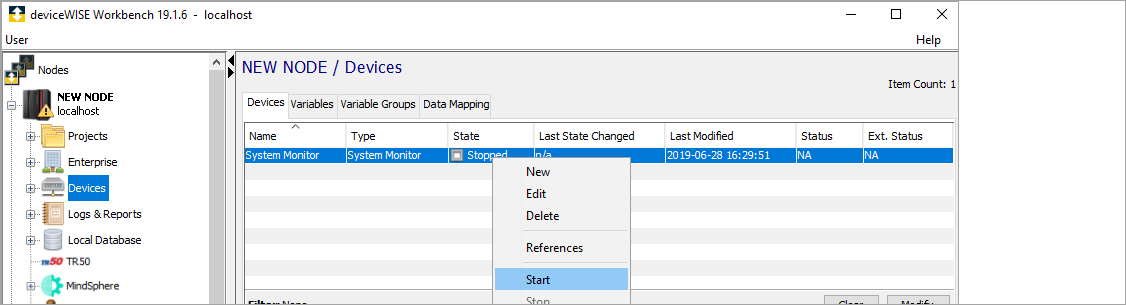
The NEW NODE appears under Nodes - Navigate to Administration >> Packages and add System Monitor Driver package. For more information on installing the System monitor package, see Packages
- Click Devices
- Right click on System Monitor and select Start
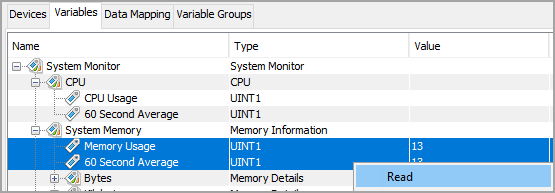
The device should be now started. - To verify that the System monitor is reading data, click on the Variables tab.
- Expand the System Monitor tree until you see the variables.
- Right-click on any of the variables and Read some variables to see if it brings values.
After this step, you are now ready to send these device data to MindSphere.
This section will provide you a step-by-step guide to create the logic to send the device data to MindSphere. To create a trigger, do the following:
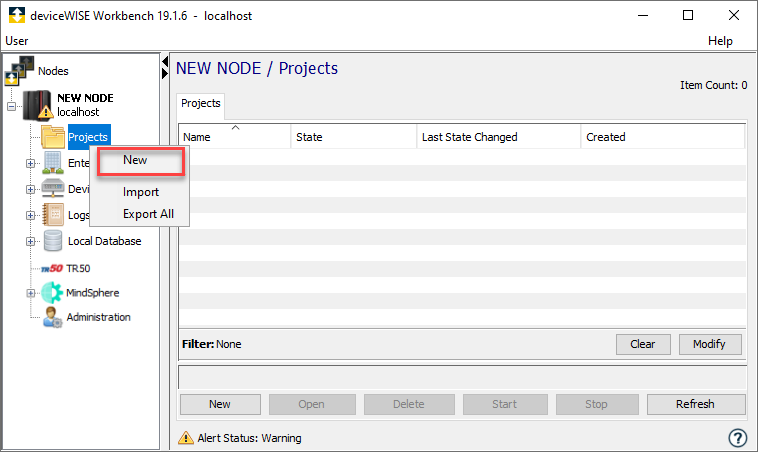
- Right-click on Projects and select New
- Enter a Name and Description
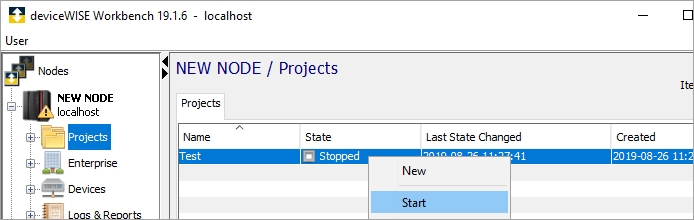
- Right-click on the new project and click Start
The project state changes to Started - Double-click on the project you just Started to open the project on a new tab
- Click New to start defining a new Trigger.
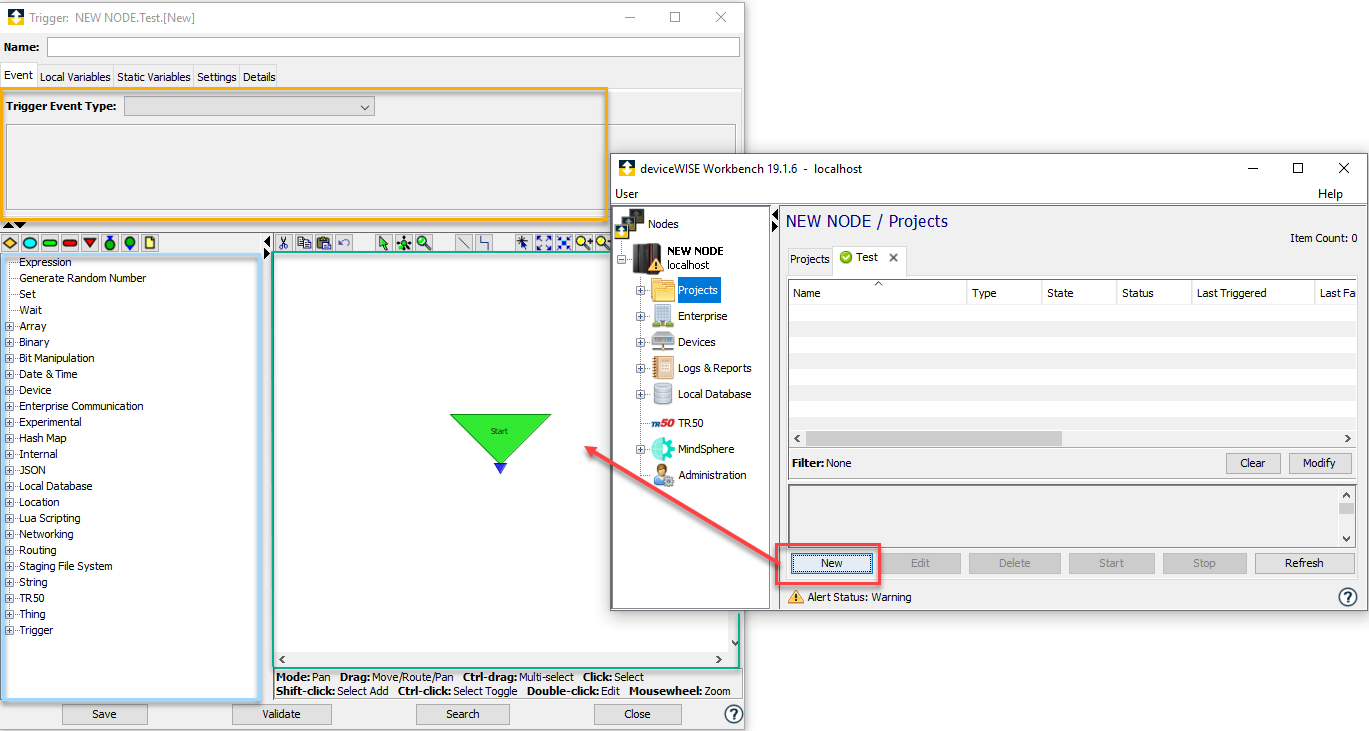
The Trigger screen appears. The yellow box contains the event types, the blue box contains the actions, and the green box is the canvas. To define the trigger do the following:- Enter the Name of the trigger.
- Click the Trigger Event Type drop-down and select Schedule as the event type
Make sure that the Frequency is set to Periodic with a Period (ms) set to 1000 - Expand the MindSphere action group and drag & drop the Time Series action onto the canvas.
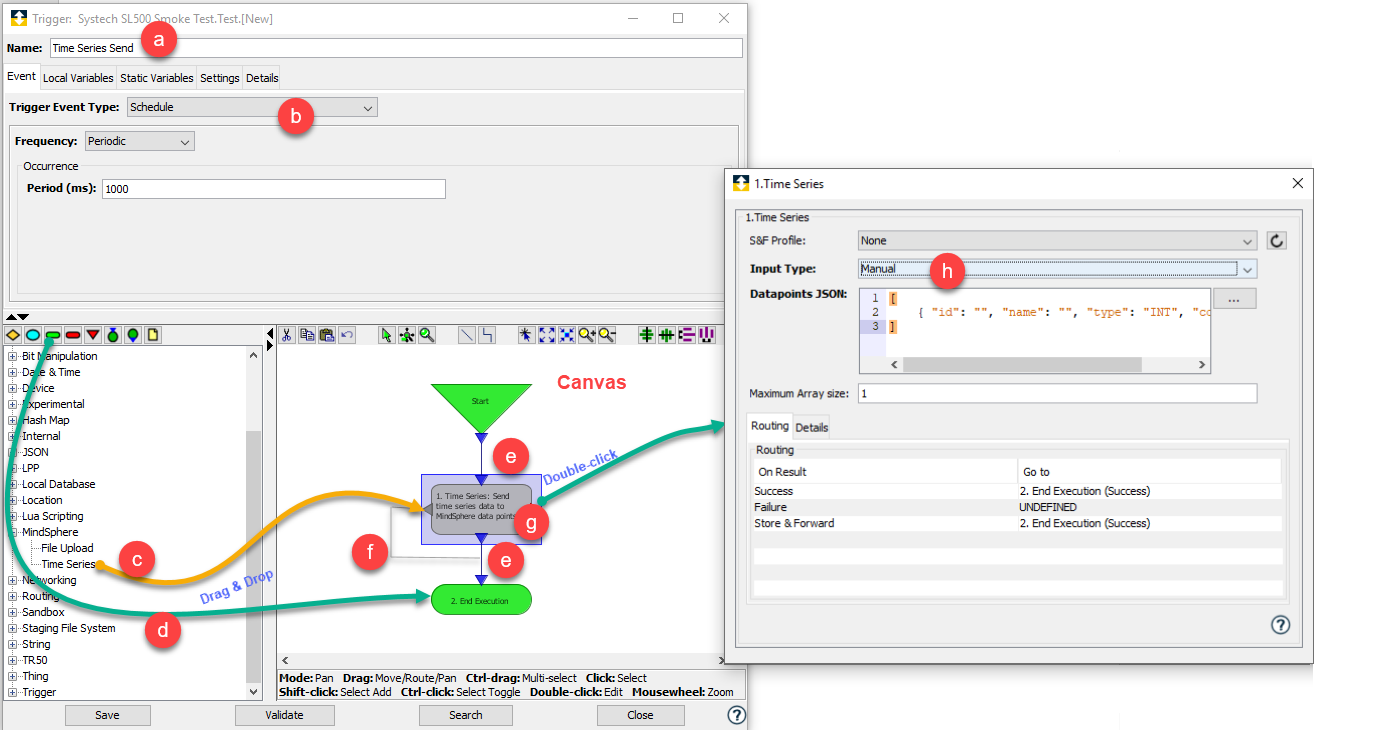
- Drag & Drop the end execution block located above the Trigger action group.
- Connect the Start to the Time Series action block and connect the Time Series action block to the End Execution.
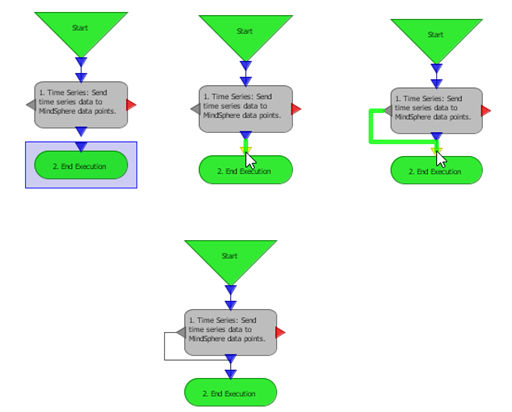
- Connect the grey arrow for store and forward ( The store and forward is not used in this example)
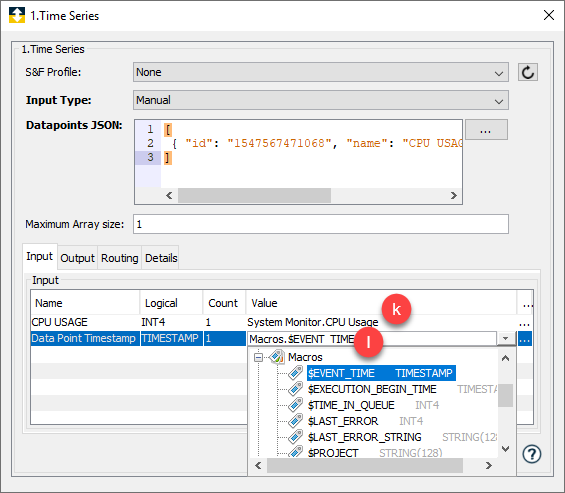
- Double-click the TimeSeries action block to edit the action
- In the Time Series window, click the Input Type drop-down and select Manual. If you have service credentials, use the Auto Input Type.
The Datapoints JSON appears. - Select Auto Input Type instead of Manual.
All the available Datasources will be listed in the Datasource drop-down - Select a datasource from the Datasource drop-down.
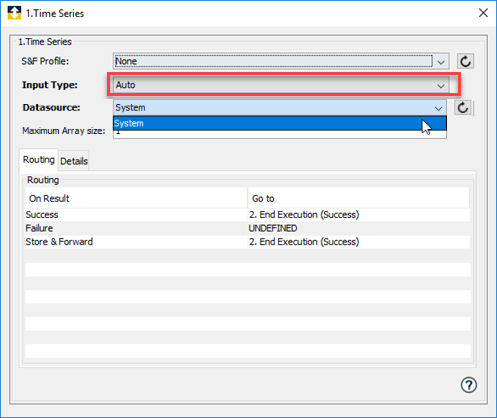
The Datapoints from MindSphere should automatically appear in the Input table. - Go to the MindSphere and copy the datapoint ID and Type from the configuration panel.
- Paste the values in the corresponding parameters in the Datapoints JSON.
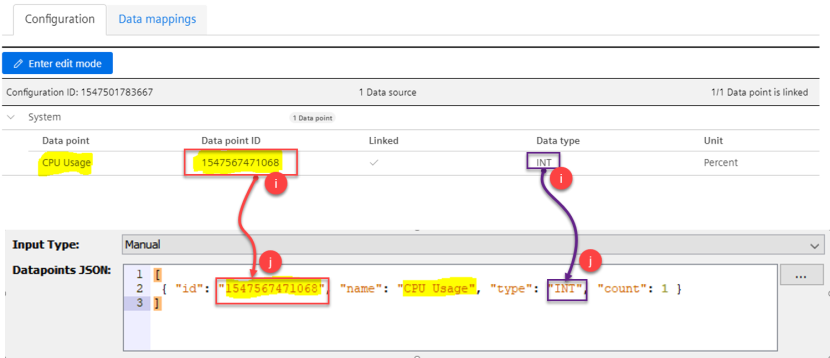
A variable should appear in the Input tab with the name you used in the JSON.The name need not match with the Data point in MindSphere but ID and type must match.
- Map the newly created variable with the device variable in deviceWISE
- Map the Data Point Timestamp to the $EVENT_TIME macro.
- Save and Close the Trigger editor
If you already have service credentials: - Right-click on the trigger and click Start

The trigger is started. The success count starts to increase. Each success is a trigger firing and sending the data to MindSphere with a timestamp.
Even though we are sending MindSphere to our core asset it is not stored or visible in the fleet manager. We will need to map our datapoint to a virtual asset variable with the same data type and unit.