The Mitsubishi driver has the ability to interface with the FX5 (iQ-F) family of Mitsubishi CPUs. The configuration steps for the FX5 CPUs are performed using the MELSOFT GX Works3 software. The FX5 CPU must be available to the Mitsubishi driver via a TCP/IP connection. The IP address of the CPU can easily be set and later obtained using the MELSOFT GX Works3 software. In this example it is assumed the user has taken the steps necessary to either create a new FX5 CPU GX Works3 project or has read an existing GX Works3 project from an FX5 CPU.
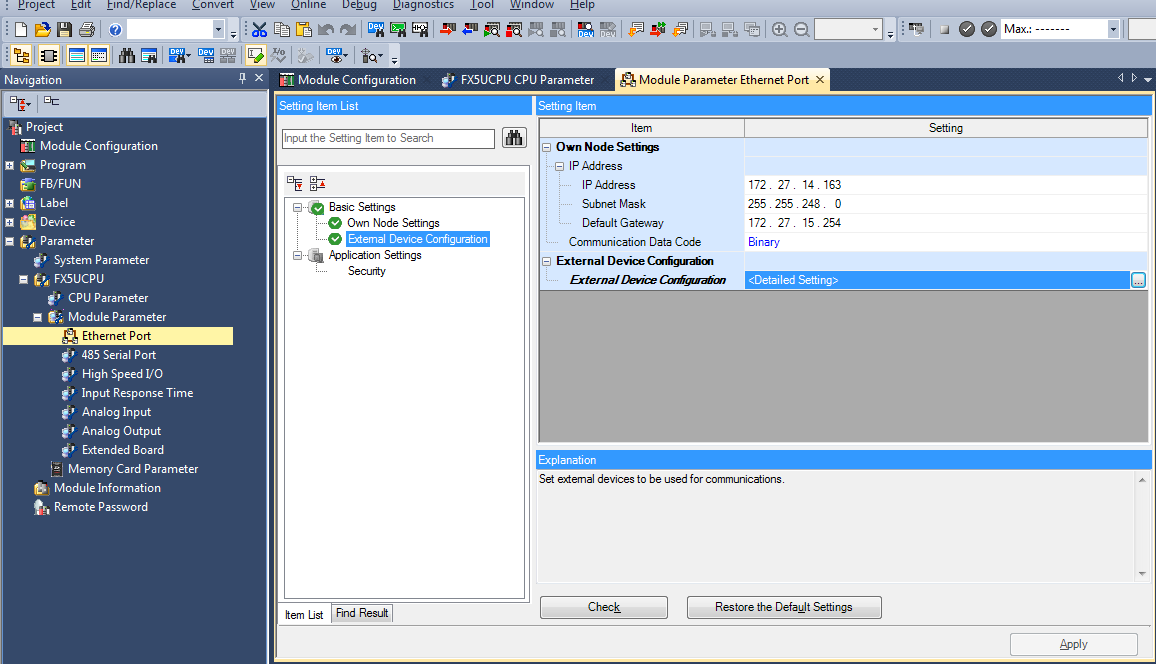
- After creating a GX Works3 project (or opening an
existing one), expand the Parameter option and the
FX5UCPU option. Expand the Module Parameter option and
select the Ethernet Port menu selection.
-
The Module Parameter Setting panel will be displayed. On this panel, set the fields as follows.
Property Value IP Address The IP address of the FX5 CPU Subnet Mask As specified by your network administrator Default Gateway As specified by your network administrator Communication Data Code Select Binary Code External Device Configuration Select this field and click on the  icon
icon - The Ethernet Configuration (Built-in Ethernet Port)
panel will be displayed. Expand the Ethernet Device
(General) option in the right hand pane.
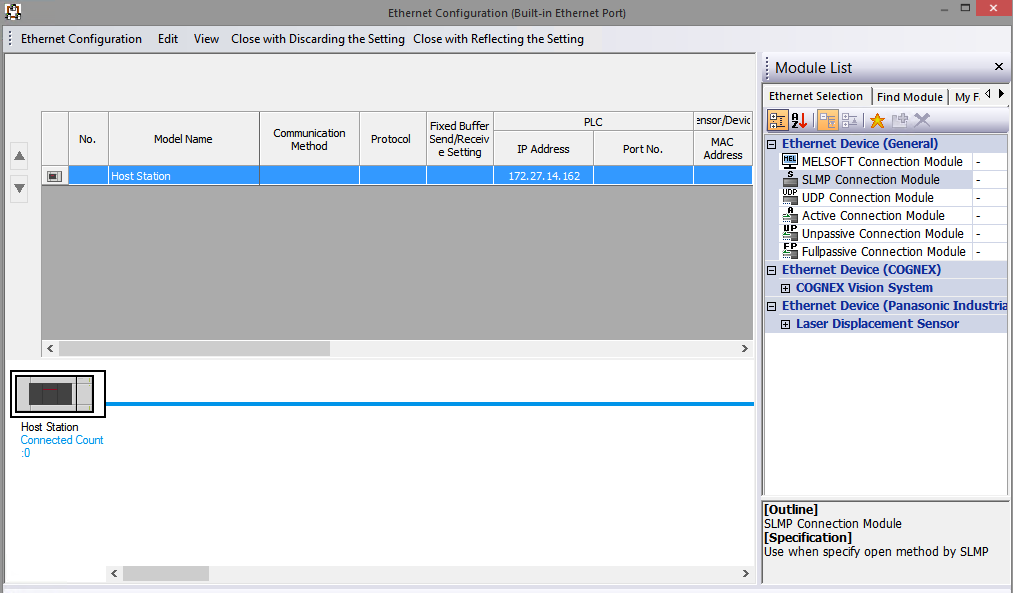
- Click and Hold the SLMP Connection Module and drag
it to the left pane. Release the mouse button when the
cursor is in the connection table shown in the left
pane.
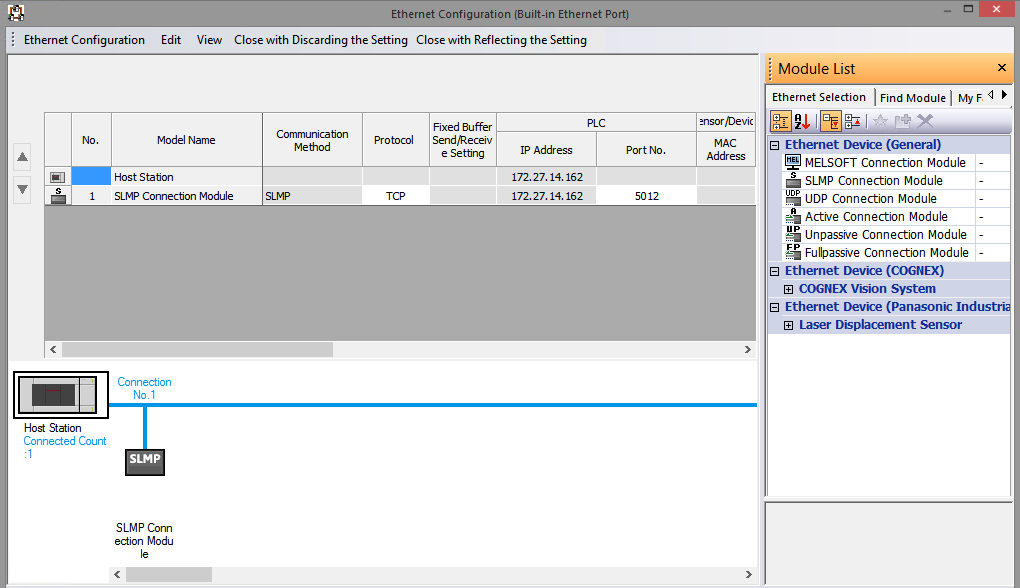
- Set the Protocol value to TCP and enter a value in
the Port field. The Port value must not conflict with
any ports that are currently defined or reserved for
use by the FX5 CPU.
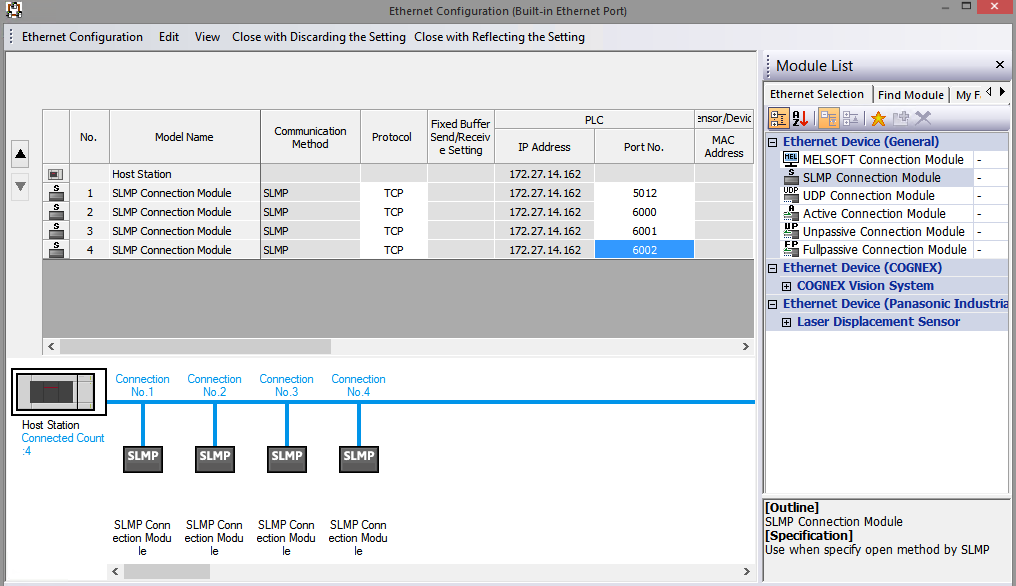
- The FX5 has a limitation of only one external
connection per SLMP Connection Module. If multiple
connections to the FX5 are needed, then multiple SLMP
Connection Modules will need to be defined, each with
its own unique Port number.
- Click the Close with Reflecting the Setting option
to save the configuration defined on this panel.
- The Module Parameter window is displayed. Click the
Apply button in the lower right hand corner of the
window to save the changes made in the Module Parameter
window to the project.
- The project is now ready to be written to the FX5 CPU device.