A trigger's actions define the trigger's application logic (what the trigger does). Trigger actions are individual function blocks that provide a single step in the trigger's application logic. The execution flow, or route, through the trigger's actions can be controlled based on an action's result and run time values of variables.
The trigger actions available in the trigger editor depends on the type of product installed on the node (for example Enterprise Gateway or Asset Gateway), as well as the packages and extensions installed on the node (for example the device drivers).
The trigger actions are documented in the Trigger actions reference.
The Workbench supports two trigger editors: the List Editor and the Canvas Editor. Triggers can be initially defined using either editor and then edited and saved with the other editor. For consistency of the underlying trigger definition's action location (Canvas Editor) and action number (List Editor), it is usually best to consistently use one editor or the other for a trigger.
Specifying actions using the List Editor
When you use the trigger List Editor to define a new
trigger, the Trigger window is displayed: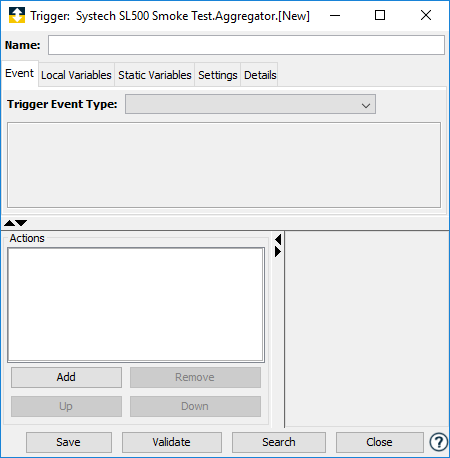
Actions are added to the trigger by selecting the Add button in the Actions section of the window, and then selecting the specific action to add.
After an action is added to the trigger, the left hand pane displays the parameters for that action.
After multiple actions are added to the list, the actions can be reordered by using the Up and Down buttons.
Actions can be removed using the Remove button.
Right clicking an action will display a pop-up menu with the options to Duplicate the action or Renumber the actions in the list to their current sequential order.
Specifying actions using the Canvas Editor
When you use the trigger Canvas Editor to define a new
trigger, the Trigger window is displayed: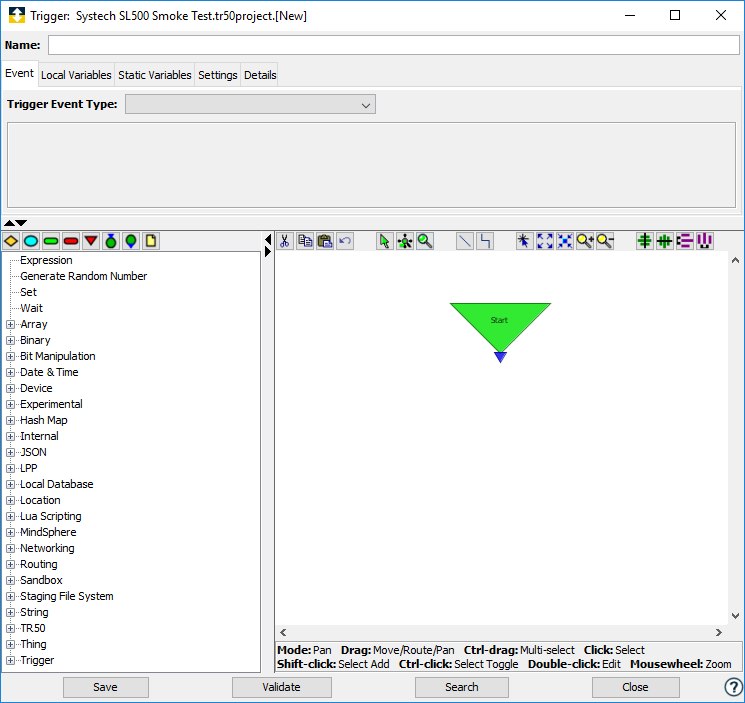
Actions are added to the trigger by selecting (click
once) the specific action from the left hand pane and then
selecting (click once) the location in the right hand pane
canvas to place the action block.
A drag and drop style is also supported by selecting (click
once and hold) an action and dragging the cursor to the
location in the right hand pane canvas and dropping
(release the mouse button) to place the action block.
After an action is added to the canvas in the left hand pane, double clicking the action displays the parameters for that action.
Actions that have been added to the canvas in the left hand pane can be re-positioned by dragging and dropping them.
Actions can be removed by selecting them (click once) and then using the delete key. Other navigation functions are listed below the canvas and also provided by the icons in the toolbar above the canvas.
For more information on using the Canvas Editor, see Using the Canvas Editor.
Entering action properties
Each action has the specific properties needed for the action to provide its function. These properties can be provided in the action's:
- Parameters
- Input tab
- Output tab
An action may or may not have parameters, an input tab or an output tab depending on the action's provided function.
Using the Array Average action as an
example:
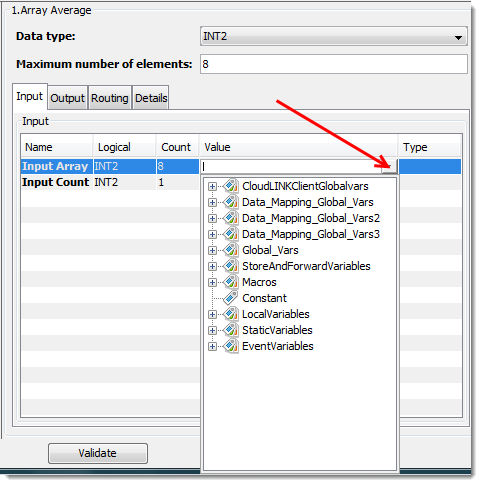
The main pane has two parameters:
- Data Type - which is a drop down selection list parameter
- Maximum number of elements - which is an numeric entry parameter.
This action has both an Input tab and
an Output tab. Each tab has rows for each
of its parameters.
When a parameter can be specified by a device variable,
trigger macro, constant, trigger local variable, trigger
static variable or trigger event variable, the available
options are displayed by clicking once in the
Value cell for the parameter and then
selecting the down arrow icon.
Only applicable options are displayed. For example:
- Macros and Constant do not apply for an output parameter
- Device variables are only available if the device
is in a started state.
Parameters
Parameter fields can either be an input field where a value is entered, a popout editor for more complex parameters, or an option list.
Lists may refer to a predefined set of options that will not change, or other item definitions within deviceWISE such as transport maps, other triggers, etc., that may be dynamic.
These lists are stored when first accessed in an editor session. For a dynamic list, refreshing them may be desired if new items are defined or imported while the trigger editor is active.
Using the Fire Trigger action as an
example:
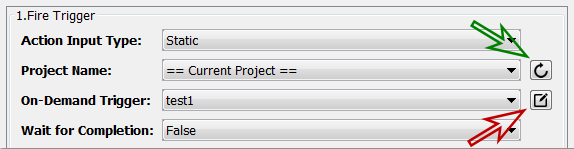
The Project Name list can be refreshed. The button to the right of the list (indicated by the green arrow) will cause the contents of that list to be retrieved from the gateway.
The On-Demand Trigger list is dependent on the project field and will be refreshed when the project field is. This applies to any option list with contents that is dependent on the value of another field.
For parameters referring to a list of triggers, an edit button will be available (indicated by the red arrow in the image below). Selecting this button will open a trigger editor window with that trigger, or switch to an existing window with that trigger if it is already being edited.
Input/Output Context Menu
Right clicking on a row in the input or output tables will bring up a context menu with the following options:
| Option | Result |
|---|---|
| Map Selected > To Local Variables | Creates local variables using the row name (or references existing variables) |
| Map Selected > To Static Variables | Creates static variables using the row name (or references existing variables) |
| Populate Array | Fills in table with array elements. This enhancement was added in release 16.1.0. See below for details. |
| Clear | Clears values from the selected rows. |
| Clear All | Clears values from all rows. |
Populate Array
Populate array allows a large table to be filled in quickly. Select a row with an array element, and select "Populate Array".
If the rows below are not all empty you'll be given the option to overwrite existing values or stop at the first row with a value, otherwise the command will be immediately performed.
Populating using BINARY values or Siemens STRING data using a 2-byte prefix is not supported.
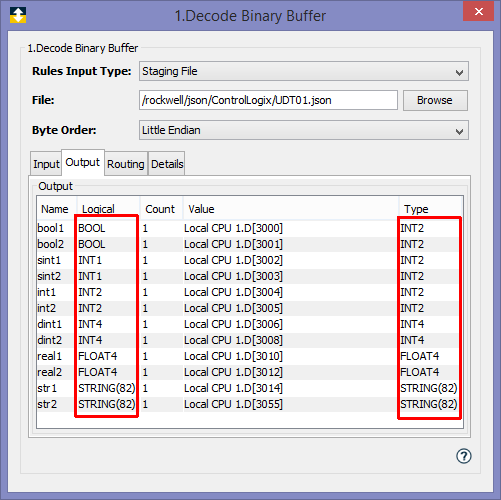
This function will determine the type of each row and how it can be mapped into an array element. For example, an array of type INT2 that can be read/written as an INT4, will have its type changed to INT4 and the index of the next row will increment by 2 instead of 1 when the logical type is INT4. A more detailed example follows:
Populate Array Example
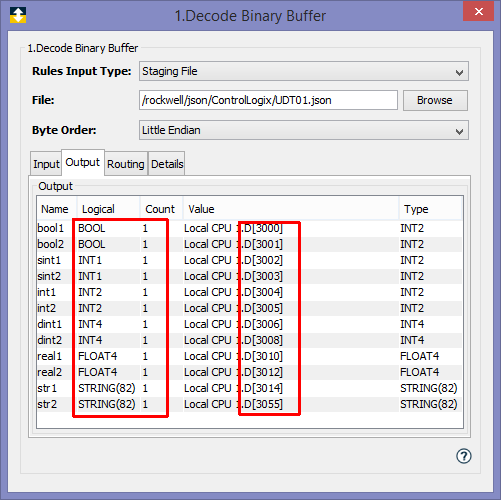
This example uses the Decode Binary Buffer action. The feature works with all actions, following the same steps.
- Select the First variable where the mapping
will begin.
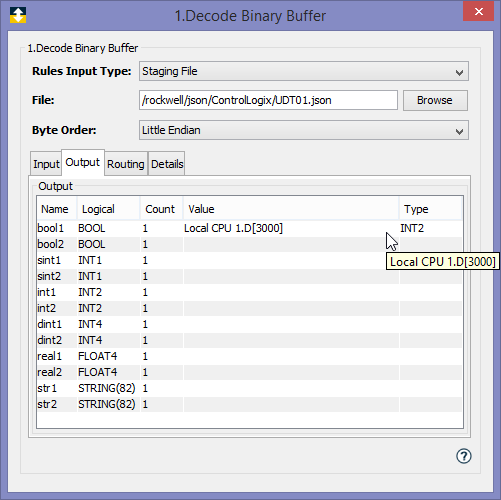
- Right mouse button click on the variable
name of the first item that was mapped, in this
example the variable named
bool1.
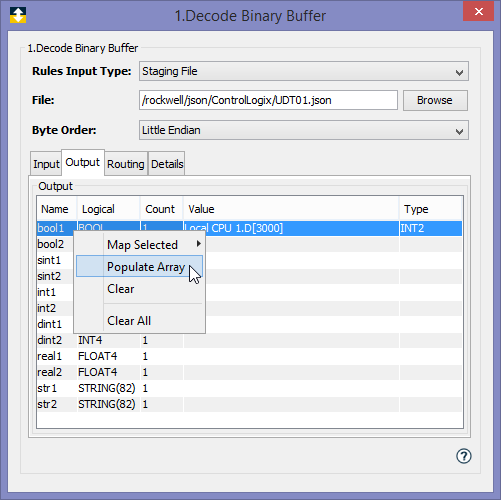
- This will display a pop-up menu with
Populate Array option. This is only
available when an arrayed value is in the
selected row. Select this option to map the
remaining variables. The result will look
similar to this:
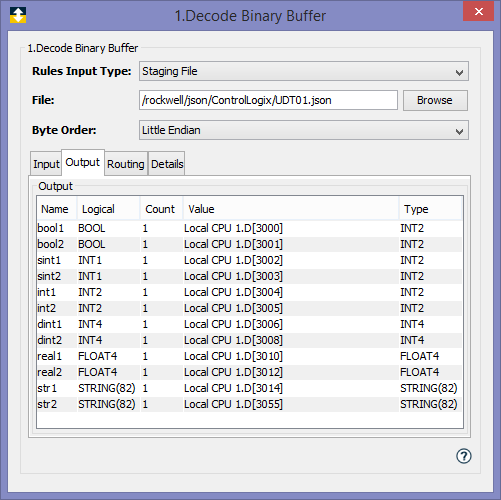
- The data types for the source variables,
which are displayed in the Logical category are
transferred over to destination variables,
shown in the Type field.
- The offsets in the variable destination are
changed based on the data type, the count, and
the memory layout of the the destination
variable.
Specifying a routing for an action
Each action has a routing, which determines what action to go to next. The specific routes available for an action depend on the different outcomes that are possible for that action.
Most actions have a Success route. Most actions have a Failure route. Actions have other routes based on the action's possible outcomes, such as the Transaction action having a Store and Forward route or the If action having True and False routes.
When using the List Editor, an action's routes are selected using the Routing tab in the left hand pane and selecting which action to go to next.
When using the Canvas Editor, an action's routes are specified by drawing connecting lines between an action's output ports to another action's input port.
Since a trigger's actions' routes specifies the trigger's execution path through the actions, it is important to understand the routes and how the application logic will be directed when the trigger is executed. Dynamic run time conditions must be taken into account, for example:
- A device not being started and its variable not being accessible.
- An external database server not being
accessible.