The End Execution (Failure) action
provides an end execution failure route for triggers
defined with the Canvas Editor.
This action should only be used when defining triggers with
the Canvas Editor.
The End Execution (Failure) action is
available from the Canvas Editor Actions
pane:
- From the Actions left pane, locate
and then expand Routing.
Alternatively, the End Execution (Failure) action is available on the Canvas Editor toolbar.
- Select (click once and hold) the End
Execution (Failure) action and then drag to
where you want the action to appear. The mouse pointer
changes and adds a crossbar.
- Release the mouse button.
The End Execution (Failure) action appears on the right pane of the Actions tab. - Double-click the action.
- The End Execution (Failure) window appears.
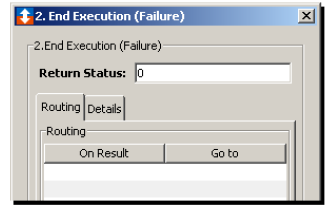
- You can accept the default value of zero for
theReturn Status parameter Return
Status parameter, or type an application
specific error code to identify the error. A custom
error code enables you to identify where the error
occurred in the trigger if there are numerous end error
exits.
- Close the window.
The following assumes that you have specified an action from which to connect the End Execution (Failure) action (for this example, the Set action).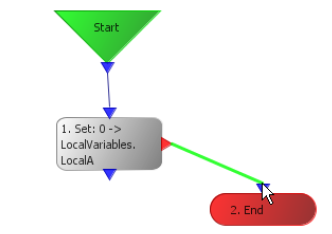
- Select (click once and hold) the desired output
connector, and then drag the line to the input
connector of the End Execution
(Failure) action.
- Release the mouse button. The connection is
made.
Once the trigger is saved and started, you can track the success or failure of the trigger using the project tab associated with the trigger. When the trigger has reporting turned on, you can view the report (from the Reports tab) and then check the return status of the End Execution (Failure) action.