Step 2 - Defining the TCP transport
This section describes the steps to define a TCP transport using the IP address of the computer where the TCP Receiver Client resides.
The TCP protocol is included with the Enterprise Gateway products. Other protocols such as relational databases and message queuing systems are turned on using a license.
A TCP transport represents the TCP connection to the partner enterprise application.
Before you begin to create a TCP transport, the following is assumed:
- The TCP Receiver Client program is running on your local computer.
- The Workbench is started and you have logged on.
Example TCP transport
For this example, the TCP Receiver Client program on your local computer is the partner enterprise application.
- From the Workbench left pane, expand the node that
where you want to define the TCP transport.
- Expand Enterprise, right-click the
Transports icon to display its pop-up
menu, and then select New.
The Transport window appears. - In the Name parameter, enter
MyTCPTransport. This will be the
unique name for the transport. You will not be able to
type invalid characters. For example, spaces are not
allowed. You will not be able to insert a space in the
name.
- Use the Type parameter drop down list to select TCP.
- In the Host parameter, enter the IP address or host name of the computer where you want the messages sent. For this example, this is the IP address where the TCP Receiver Client program is running.
- In the Port parameter, enter the port number of the computer where you want the messages sent. For this example, use the port number 4444.
- In Mode box, accept the default connection-oriented. For more information on the TCP Transport and its parameters, see TCP transport.
- Select the Load transport at initialization check box to have the transport connect to the host when the node starts up.
- Make sure the Include header in payload check box is selected. This check box is selected to allow the TCP application to receive a 8-byte header as part of the data. The data, or payload, that is sent by the TCP transport will begin with an 8-byte header. The first 4-bytes will be the length of the data (not including the 8-byte header), and the next 4 bytes are set to zero and reserved for future use
The Transport window also provides two other tabs.
Adding timeout values
The Timeout tab provides values that
affect connection and execution times.
Accept the default value for each Timeout
parameter.
The Connection timeout parameter defaults
to 10 seconds and specifies the length of time the system
will try to connect to a target computer (where the partner
TCP program is running). If the connection is not made in
the specified time period, an error message is sent to the
exception log.
The Execution timeout parameter defaults
to 5 seconds and specifies the amount of time the
Transaction Server component should wait (once the
connection is made) for a TCP transaction to complete. The
time value should be the outer limit for how long you
expect a typical transaction to take using a transport.
Creating custom payloads
The Custom Payloads tab lets you
specify a predefined Java application program to use for a
custom payload format.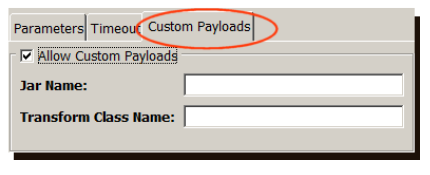
When you select Allow Custom Payloads
check box to enable a TCP transport to use a custom
payload, you must specify the name of the jar file and
class name.
We will not not use the custom payload feature for this
example.
For more information on custom payloads, see Custom Payloads tab.
Validating and saving the transport
Now that you have entered an appropriate value for each parameter, you must validate the connection, and then save your work.
- From the bottom of the Transport window, click
Validate.
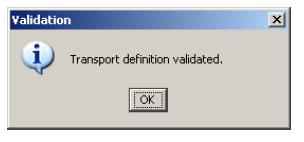
The enterprise connectivity feature tests the connection to the partner application using the IP address and port. - A message will tell you whether or not the
validation was successful. Click
OK.
- If no errors are received, click Save.
The new transport definition is saved to the node and listed on the Transports tab.
The next step is to define the transport map.