The Administration page provides administration features for org admins. To access the Administration page, click the (cog menu) ![]() >> Administration on the top right corner of the Management Portal.
>> Administration on the top right corner of the Management Portal.
The Administration dashboards displays the Rate Limiter Status, the usage data graphs and tables that shows various usage reports by your organization. The Limiter Status shows the various The usage graphs on the Administration page (https://<yourportal>/pages/admin) provides aggregate usage data by date for the past 30 days.
| Item | Graphs/Status | Description |
|---|---|---|
| 1. |
|
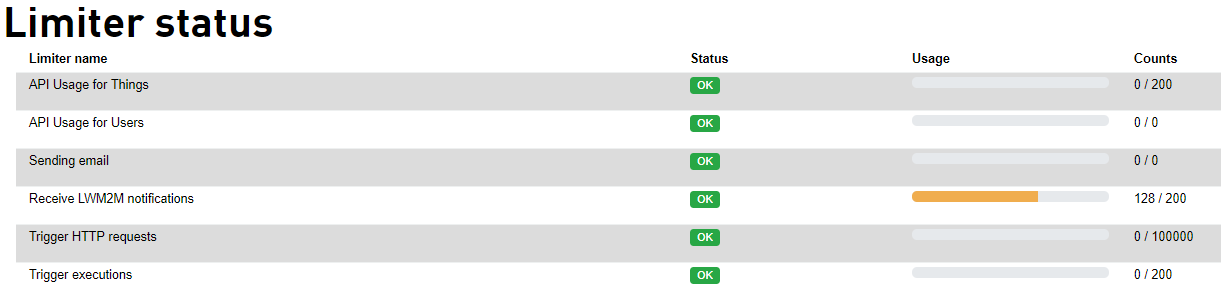
The Limiter status displays the current status of the API rate limits of your organization. If the rate limits exceeds the burst limit for certain number of times(burst number)within the set burst interval then you will be locked out from sending APIs for a set limit duration. For more information on rate limits, see Rate Limit. |
| 2. |
|
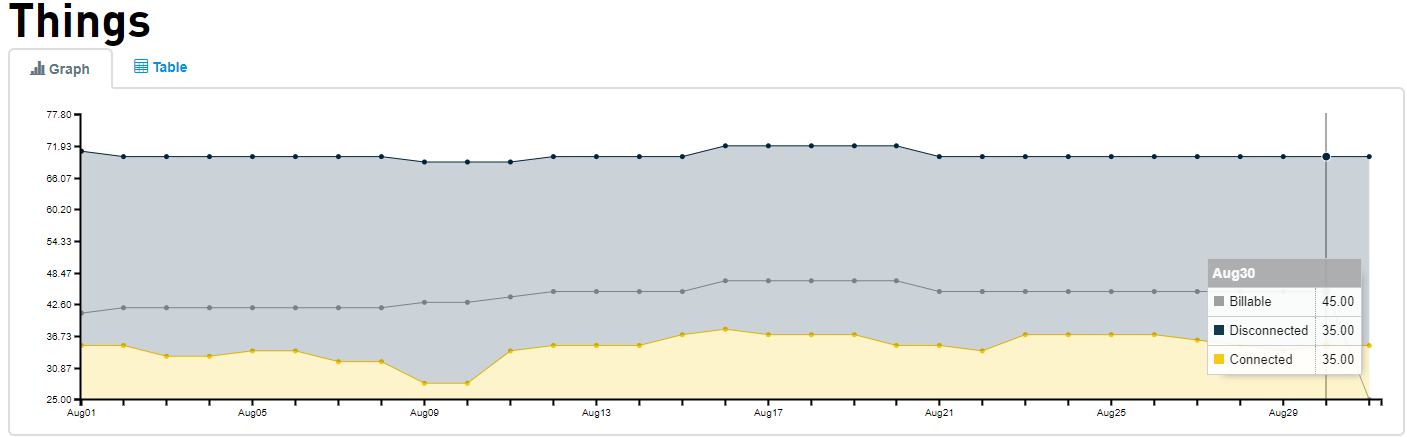
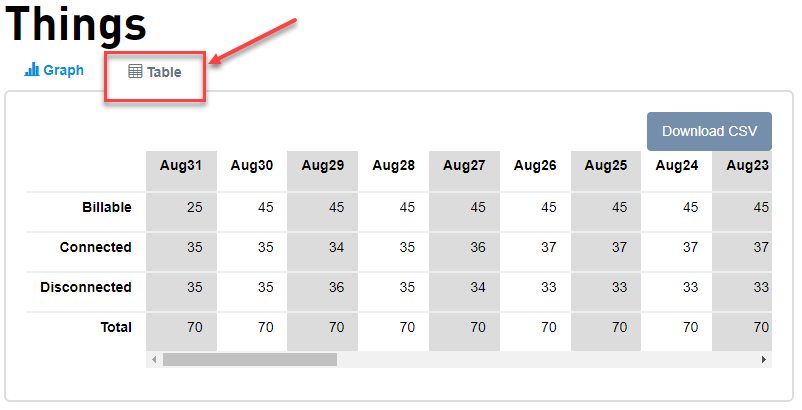
The Things graph displays by default the things data for the past 30 days with the number of Connected, Disconnected and Billable devices. To request data for a different set of dates, click on the Configure graphs Within the Things widget click on the Table tab to display the values for each day.
|
| 3. |
|
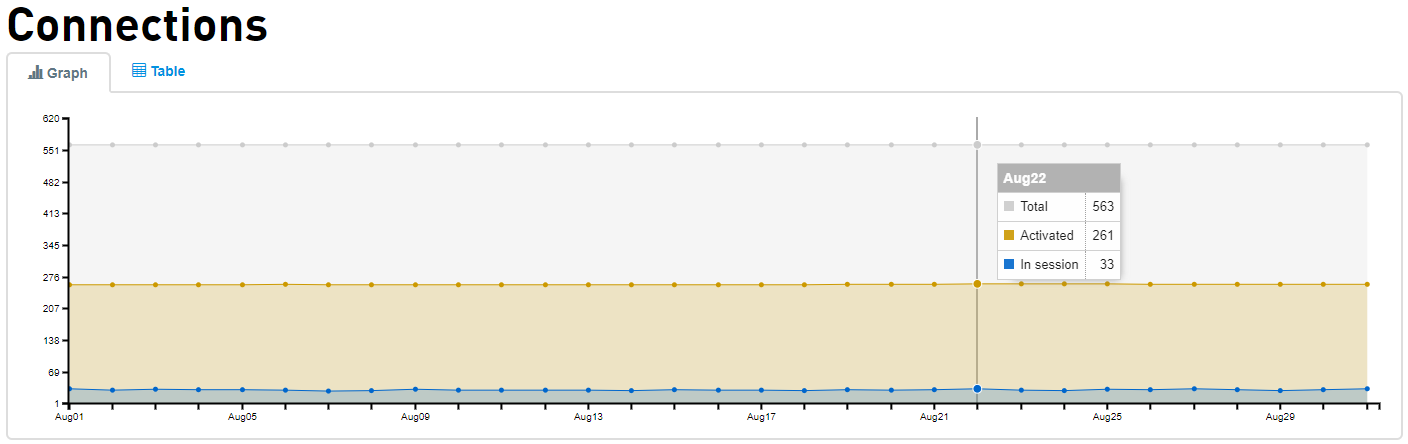
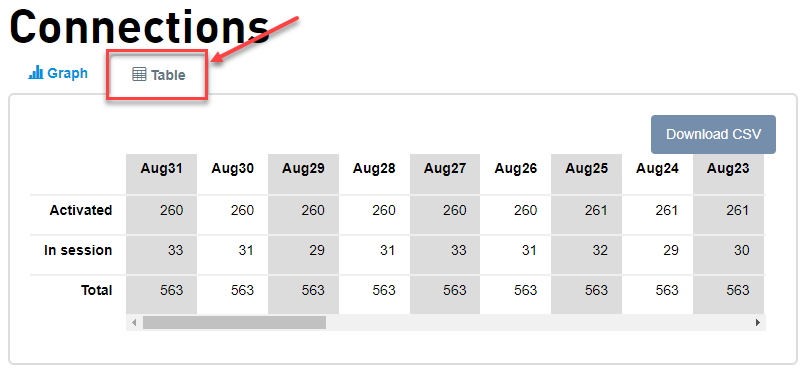
The Connections graph displays by default the connections data for the past 30 days with the total number of devices and those that are Activated and In session. To request data for a different set of dates, click on the Configure graphs Within the Connections widget click on the Table tab to display the values for each day.
|
| 4. |
|
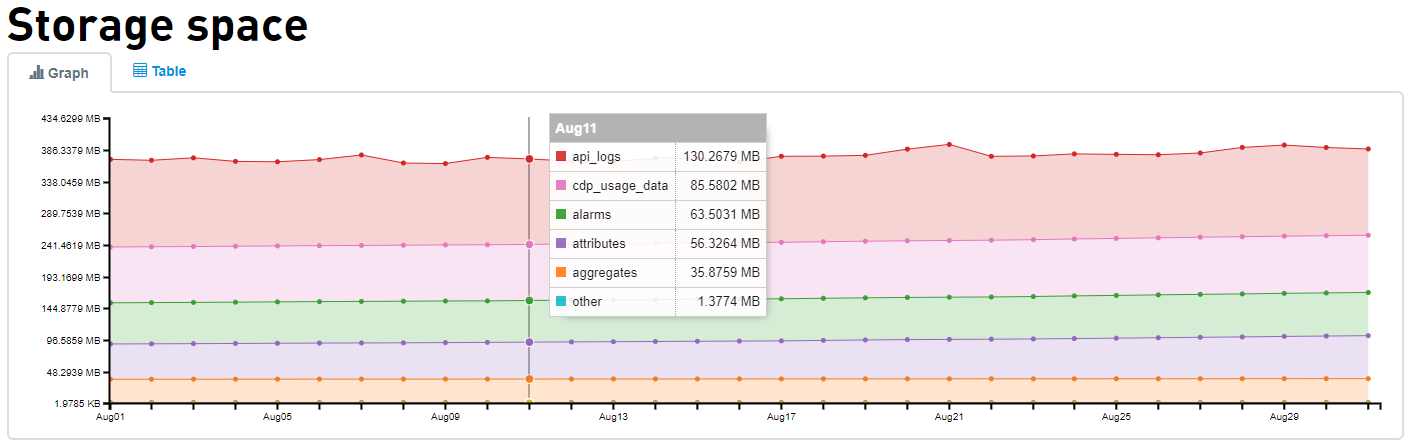
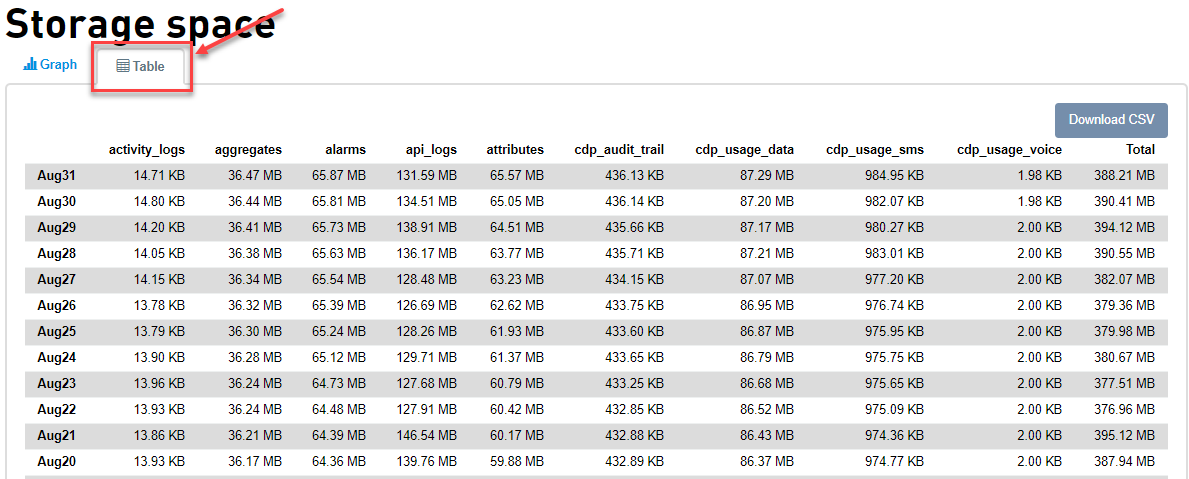
The Storage space displays by default the storage space used for the past 30 days. The graph shows the usage by each category from the highest to the lowest. To request data for a different set of dates, click on the Configure graphs Within the Storage space widget click on the Table tab to display the values for each individual day along with the total usage per day.
|
| 5. |

|
The API calls display by default the number of API calls made by your organization for the past 30 days. The color coded bar graph shows the number of API calls and when you hover over the graph it shows the top 6 APIs with the number of calls. To request data for a different set of dates, click on the Configure graphs Within the API calls widget click on the Table tab to display the API calls per day.
|
| 6. |
|
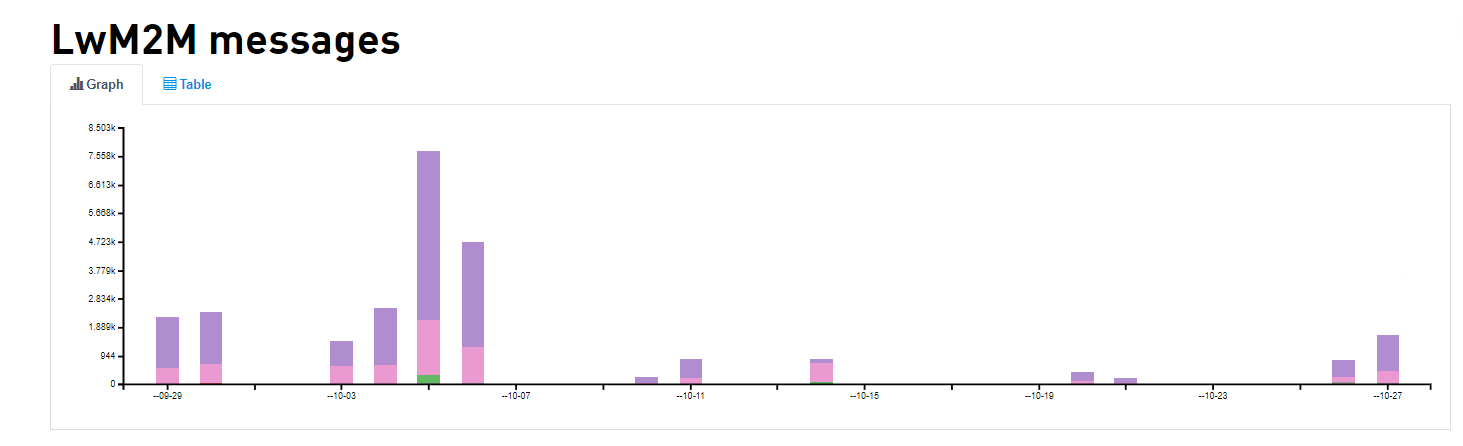
The LwM2M Messages display by default the number of LwM2M Messages made by your organization for the past 30 days. The color coded bar graph shows the number of messages. To request data for a different set of dates, click on the Configure graphs Within the LwM2M Messages widget click on the Table tab to display the LwM2M Messages per day.
|
| 7. |
|
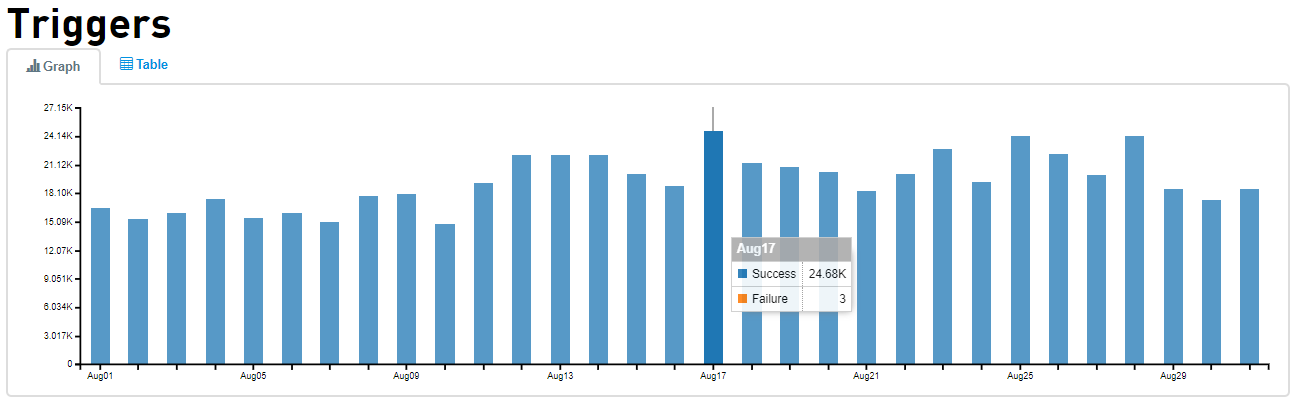
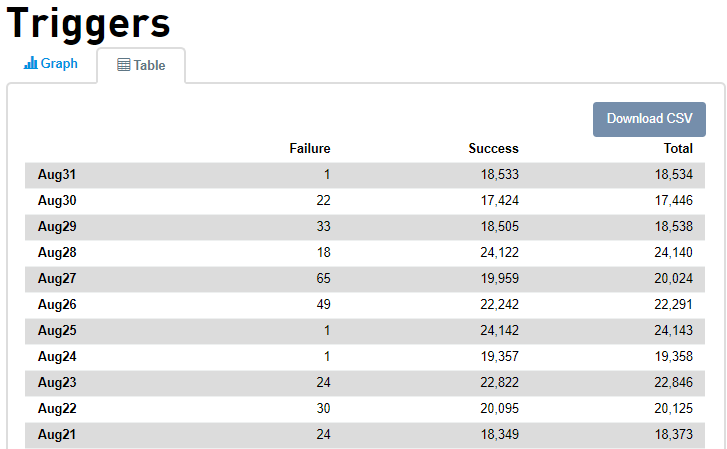
The Triggers display by default the success and failure count for the past 30 days. Hover over the graph to see the number of successes and failures per day. To request data for a different set of dates, click on the Configure graphs Within the Triggers widget click on the Table tab to view the total number of APIs |
| 8. |
|
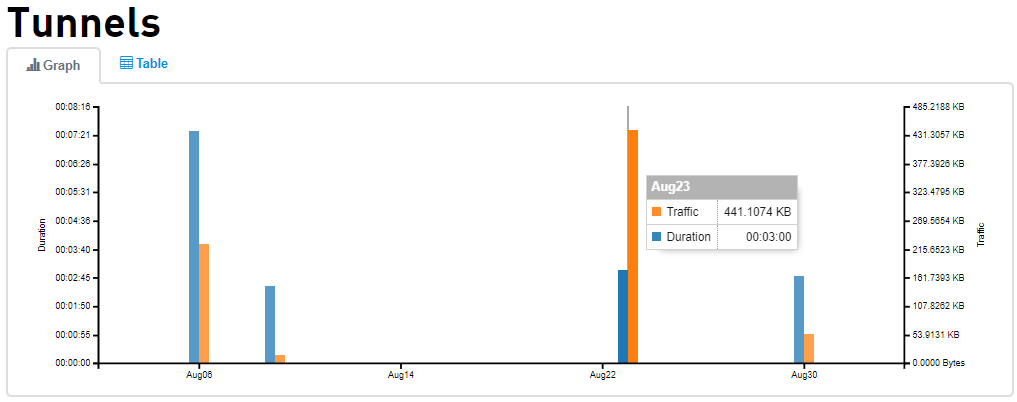
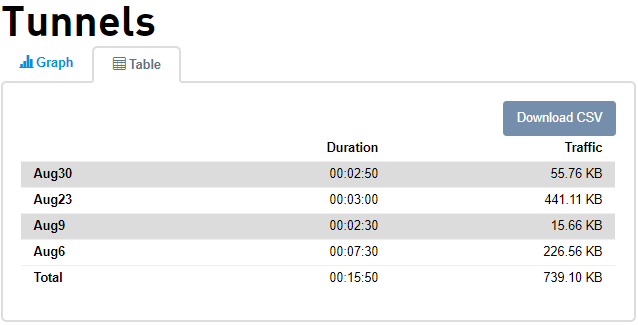
The Tunnels display by default the usage of tunnels with the amount of data transferred and the active duration of the tunnel. For more information on tunnels, see Tunnel Configuration To request data for a different set of dates, click on the Configure graphs Within the Triggers widget click on the Table tab to view the total number of APIs |


You will be able to configure the graph to show a date range or a relative date. To configure the graphs, do the following:
- Click
 on the top right of the Super Administration page.
The Graph Configuration page opens. - Click Select a date format drop-down - select Relative or Date Range. When it comes to the "Include sub-orgs" checkbox, it is important to note that the graphs are aggregated on the current orgs (Parent) data.
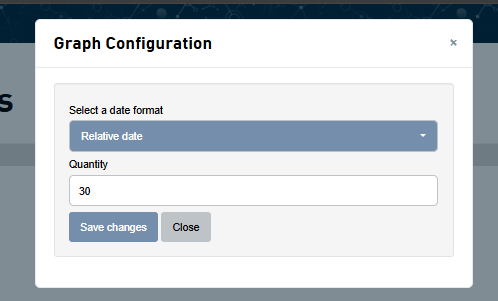
- Click Unit drop-down and select the number of days/hours.
- Click Select a Unit drop-down - days/hours.
- Click View by hours or days drop-down - select by hours/days.
- Click Save changes.