Assigning a Billing Plan
To assign a billing plan to a connection or a thing, do the following:
- On the Administration screen,
under the PRICING group, click on
the Billing plans.
The Billing plans screen appears. - Click Recruiter .
The Recruiter screen appears. - Enter or select the following details:
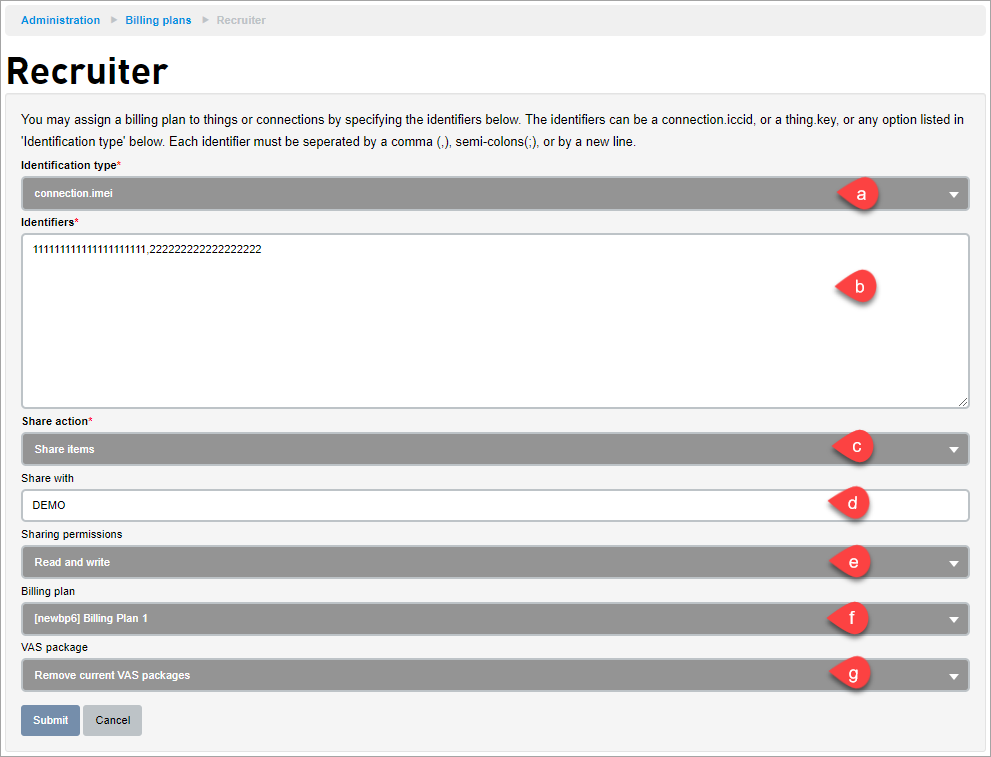
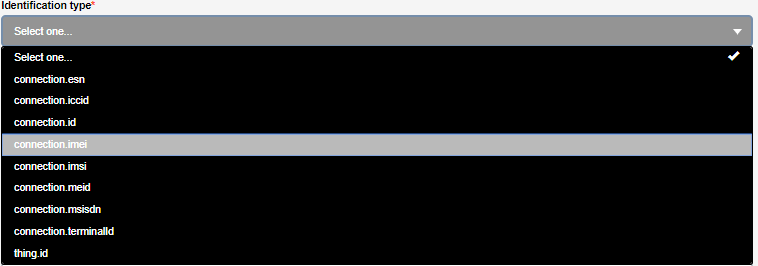
- Click the Identification
type drop-down and select an
Identifier type that will be used in the
identifiers field. The identifier contains the
following options to choose from:
- Enter the things or connections identifier you want to use the billing plan. For example, thing.id, connection.iccid.
- Click on the Share action drop-down and select Share/Unshare items to either Share or Unshare items with Organizations.
- Enter the organizations to which the
Things/Connections you entered above gets
shared with the chosen Billing plan and VAS
packages.
Not supplying an organization will neither share or unshare the item.
- Click the Sharing permissions drop-down and select the permissions you want to provide to the sharing organization.
- Click on
the Billing plan
code drop-down and
you select one of the following options:
- Keep the current Billing plan
- Remove the current Billing plan or
- Update to a different Billing plan.
For more information on Billing Plans, see Assigning a Billing Plan.
- Click on the VAS
package
code drop-down
and
you select one of the following options:
- Keep the current VAS package plan
- Remove the current VAS package plan or
- Update to a different VAS package plan.
For more information on VAS packages, see Assigning a VAS package.
- Click the Identification
type drop-down and select an
Identifier type that will be used in the
identifiers field. The identifier contains the
following options to choose from:
- Click Submit