Cloud triggers Part 2 - Defining your cloud trigger
This part will walk you through defining a cloud trigger that executes when a thing's property value changes.
Defining your cloud trigger
- In the Management Portal, select the Developer link in the menu at the top of the page.
- On the Developer home page,
select Triggers to view the triggers
that have been defined in your organization.
- On the trigger list view, select New trigger to open the trigger editor.
- Set the name of the trigger to "Send email when its too hot".
- Configure the trigger event. The trigger event
defines when the trigger will execute, a trigger could
be specified to fire only when something changes on a
specific thing or on groups of things.
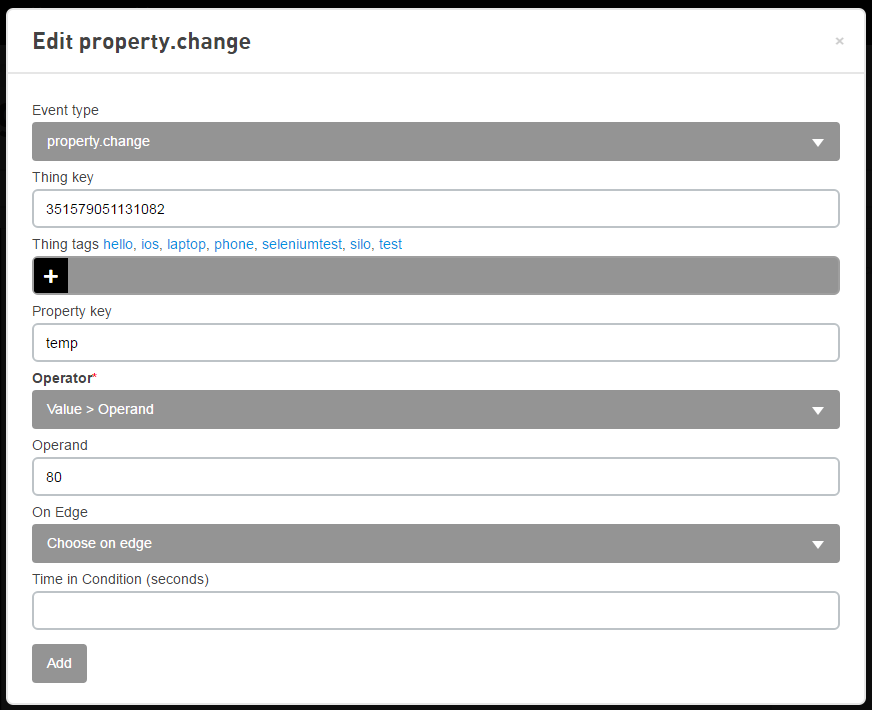
Depending on which event you select, there are different options available.- Set the Event Type field to property.change.
- Set the Thing Key to the
thing key of the thing you configured in the
first part of this guide.
This field filters the trigger for a specific thing, you can leave this blank to fire for all things. - Set the Property Key to
temp (This setting restricts the trigger to
only fire when the temperature changes).
This field filters for a specific property key, it can be used across multiple things or thing definitions, for example "temp" or "pressure" can be universally handled in many applications. - Set
the Operator to Value
> Operand.
This is the condition we are looking for, the trigger can monitor for specific conditions before firing. - Set
the Operand to 80 degrees.
This is the value we are comparing against to determine if the trigger should be fired. - Your event configuration should look
similar to this:
- Define the first trigger action. The trigger
actions define what you want to occur when the
event occurs. You can have multiple actions.
Open the Thing action category group and drag the thing.log action onto the canvas.
This action logs a message in the event log for the thing.- Set the Thing Key field
to $(event.thing.key).
This field specifies which thing gets the message, using $(event.thing.key) is a macro that will tell the action to put the message in the event log for the thing that published the value change. This is useful for when you have thousands of things you can still have just a single trigger. - Set the Message field to
"It is too hot, the temperature is:
$(event.prop.value) degrees.".
This field specifies the message that will be saved in the log, note the macro to get the value from the property that changed. - Save these settings.
- Create the route from
the Event node to
the thing.log node.
- Define the second action.
- Open the Email action
category group and drag the
email.send action onto the
canvas.
This action sends an email. - Set the To field to your email address.
- Set the Subject to
"$(event.thing.name) temperature alarm!"
The macro will provide the human readable name of the thing that fired the trigger. - Set the Body to "Temperature alarm occurred on $(event.thing.name), the temperature is now $(event.prop.value) degrees.".
- Save these settings.
- Create the route from
the thing.log success route
point to the email.send
action.
- Open the Email action
category group and drag the
email.send action onto the
canvas.
- Add the Success action.
- Open the End action category group and drag the Success action onto the canvas.
- Create the route from
the email.send success route
point to the
Success action.
- Select the Add button to save the
trigger.
- Select the Start button to start
the trigger.
You have now defined and started your first cloud trigger.
You are ready for Part 3 - Testing your cloud trigger
Continue with Cloud triggers Part 3 - Testing your cloud trigger.