This gateway is discontinued and is no longer supported or included in build output beginning with the 19.1.7 release. Contact your Telit sales representative if you need additional information.
This page describes how to download and install the deviceWISE Asset Gateway for NetComm Wireless Router product on a NetComm Wireless system.
Prerequisites
The following is assumed:
- You have the NetComm Wireless system
- You have an Ethernet cable
- You have a computer, such as a laptop, that can be used to log on to the Management Portal and can have its IP address changed to allow a direct Ethernet cable connection to the NetComm Wireless Router at its default assigned IP address
- You have a Management Portal user ID and password
and know how to log on. You need this to download the
Asset Gateway installation files from the Management
Portal.
If you need a Management Portal account, see Creating the deviceWISE Cloud account.
If you received the installation files from your support representative, you can skip the download steps and proceed with Using the NetComm Wireless Router Web Interface program.
Obtaining the Asset Gateway for NetComm Wireless Router install files
Follow these steps to download the Asset Gateway for NetComm Wireless Router install files:
- Log on to the Management Portal, and select
Developer.
The Developer menu appears. - From the Developer menu, select
Resources.
- From under Index of files, select
the appropriate build (if you are not sure, pick the
latest available build).
- Select NetComm.
- Select Asset_Gateway.
- Select DWGateway_Install.Linux-ARM-NetComm.XXX.ipk (where XXX is the version of the Asset Gateway software you want to download) and download the file to a temporary location on the computer.
Inserting a cellular SIM card
If the NetComm Wireless Router will be configured for
cellular connection, follow the instructions provided with
the hardware to install your SIM card.
The SIM card installation instructions depend on the
specific gateway hardware model you have.
Using the NetComm Wireless Router Web Interface program
- After the files have been downloaded, to allow a
direct Ethernet connection from the computer to the
NetComm Wireless Router, temporarily change the
computer's:
- IP address for the Ethernet adapter to 192.168.1.2
- Network mask for the Ethernet adapter to
255.255.255.0.
- Connect the computer's Ethernet port to the NetComm
Wireless Router using the Ethernet cable.
- From your computer, you should be able to ping the
NetComm Wireless Router at IP address
192.168.1.1.
- Use a web browser to access the NetComm Wireless
Router at its default IP address by entering
192.168.1.1 into the address field of your web
browser.
The NetComm Wireless Router login screen appears similar to the following. Note that the different NetComm Wireless Router models may have different web interface screens.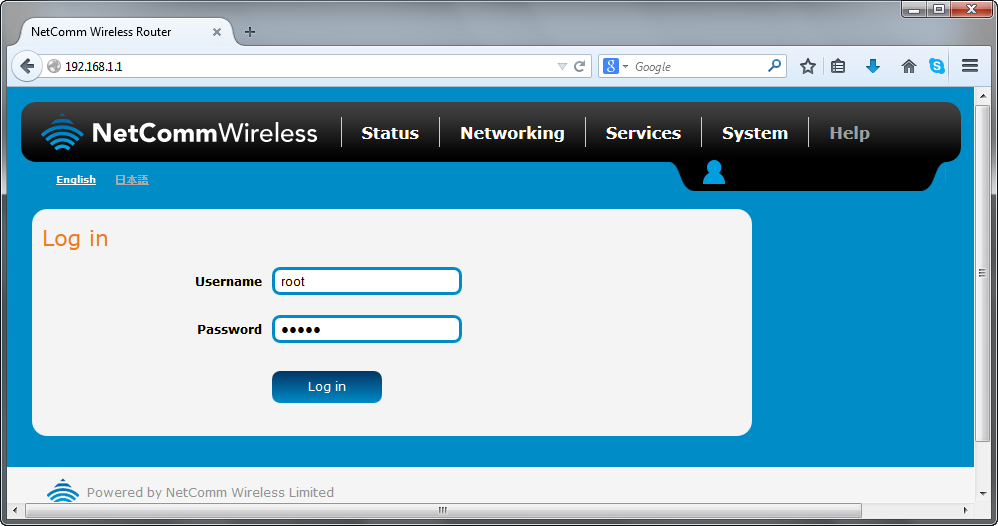
- When prompted, enter the credentials for the web
interface:
User Name = root
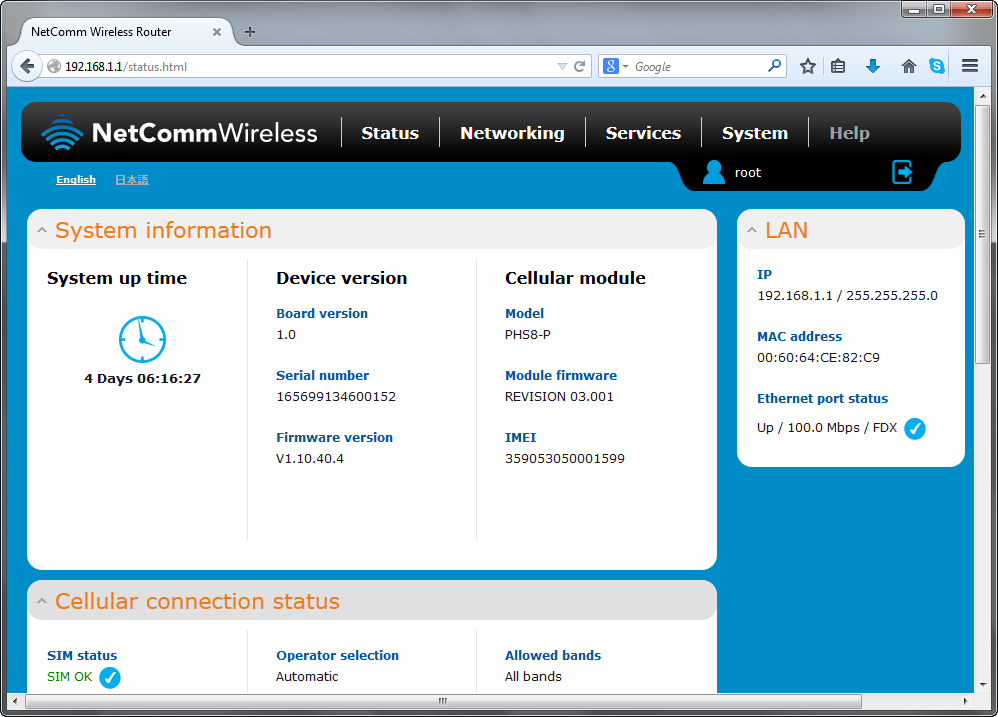
Password = admin - The NetComm Wireless Router Web Interface is used
to perform several NetComm Wireless Router
configuration tasks, including:
- IP address and subnet mask settings
- Time synchronization and time zone settings
- Enabling secure shell (SSH) and Telnet
access.
Each one of these tasks are described in the following steps. Other configuration tasks may apply to your specific environment and configuration.
- Select the Networking menu
option:
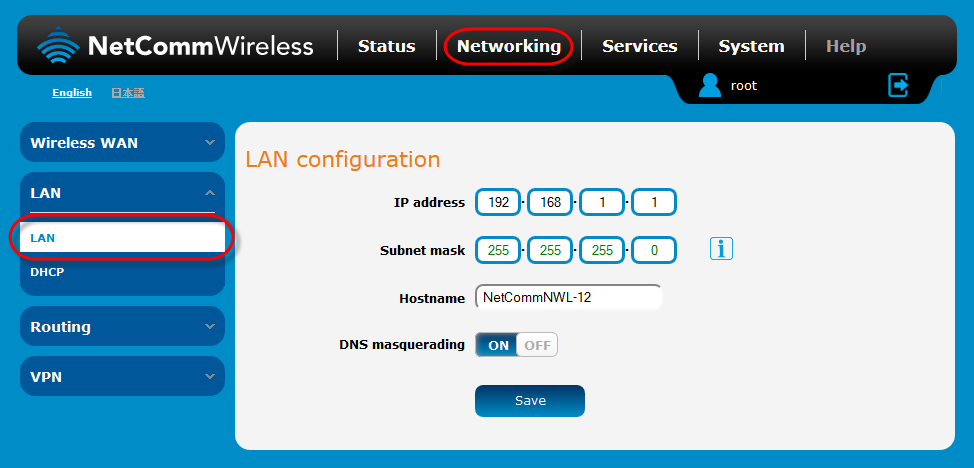
- Enter the values in the LAN
Interface section for:
- IP Address = the IP address assigned for this NetComm Wireless Router on the LAN
- Subnet mask = The network
mask to use in combination with the IP
address.
- Select Save to save the networking
settings.
- If your changed the IP address from its previous
value, your web browser will not complete its
refresh.
You will have to enter the new IP address into your web browser's address field to access the NetComm Wireless Router Web Interface at the new IP address. - Select the Services menu
option.
- Select the Network time (NTP)
option and enter values for the Timezone
settings and NTP settings
sections.
- Select Save to save the network
time (NTP) settings.
- Select the System menu
option.
- Select the Administration settings
option and set Enable local Telnet and
Enable local SSH to
ON.
- Select Save to save the
administration settings.
- Review the other menu options for settings that apply to your environment.
Load the Asset Gateway software
- After configuring the NetComm Wireless Router using
the web interface, the next step is to load the
deviceWISE Asset Gateway for NetComm Wireless Router
install file using the NetComm Wireless Router Web
Interface.
- From the System menu option,
select the System Configuration option
and then the Upload option.
Note that the different models of the NetComm Wireless Router hardware and Web Interface might have slightly different menu option names and selections.
For example: The NTC-30WV model Web Interface options are: System -> Load/Save -> Upload. - On the Upload page, select the
DWGateway_Install.Linux-ARM-NetComm.XXX.ipk file and
Upload the file to the NetComm Wireless Router.
- Once the upload of the Asset Gateway file
completes, its needs to be Installed using the Web
Interface.
- Select the Package manager option,
then select the Install option.
The different models of the NetComm Wireless Router hardware and Web Interface might have slightly different menu option names and selections.
For example: The NTC-30WV model Web Interface options are: System -> Load/Save -> Upload -> then the Install option.
After the Install option completes, the deviceWISE Asset Gateway software has been installed in the /opt/dw directory.
Uninstalling the Asset Gateway software
To uninstall or remove the product:
- You may want to do a node Back Up before uninstalling the product to capture the current application definition and system configuration information.
- Use the Netcomm Wireless Router Web Interface and
select: System -> System
configuration -> Package
manager ->
Uninstall.
The different models of the NetComm Wireless Router hardware and Web Interface might have slightly different menu option names and selections.
For example: The NTC-30WV model Web Interface options are: System -> Load/Save -> Package manager -> Uninstall.
Next steps
If you are following the steps in the Getting Started with Gateways guide, you can continue with the tasks described in Installing the Workbench to perform the initial Asset Gateway configuration and to connect the Asset Gateway to the deviceWISE Cloud.
If you are not following the steps in the Getting Started with Gateways guide and need to install the Workbench, you can continue with the tasks described in Installing the Workbench software.
If the Workbench is already installed, see The Workbench in the Gateway Developer's Guide and Reference for information on using the Workbench and the deviceWISE features that it can access.