Specifying the time synchronization source and time zone
This task can be skipped if the CP 343-1 ERPC has already had its time synchronization source and time zone set.
In order for deviceWISE Enterprise Gateway to operate correctly, the CP 343-1 ERPC must be configured with a source for clock synchronization and a time zone.
Time synchronization modes
There are two time synchronization modes:
- SIMATIC time. For more information, see the next section SIMATIC time server synchronization mode.
- Network Time Protocol (NTP) server time. For more information, see NTP server time mode.
SIMATIC time server synchronization mode
There are options available for the SIMATIC time master used in your network as follows:
- The Siemens SICLOCK TC400 can be both a NTP and a SIMATIC time source.
- Some S7-300 and S7-400 CPUs can also act as a SIMATIC time master.
For more information on SIMATIC time, refer to the STEP 7 program documentation or go to the Siemens support website at:
https://support.automation.siemens.com/
- Search for topic: "ID:19866467 How do you configure time synchronization?"
- Also search for topic; "ID:19324378 How can you calculate the actual local time (summer time or winter time) in the S7-300/400 CPU and then use it on the panel as system time?"
The advantage of using SIMATIC time is that accuracy is typically higher than that achieved with NTP mode. In addition, SIMATIC time provides these features:
- Only one SIMATIC time master is configured in the network.
- The time master station will forward the time-synchronization messages to the LAN for other stations to receive and use to set their time.
The following sections describe how to configure the SIMATIC time-of-day using a single S7-300 CPU as the SIMATIC time master. The CP-343-1 ERPC in the same station as this S7-300 CPU will forward the time synchronization information from the station to the LAN.
Specifying the S7-300 CPU as the master
The first step is to display the Properties for the
S7-300 CPU to specify the time source.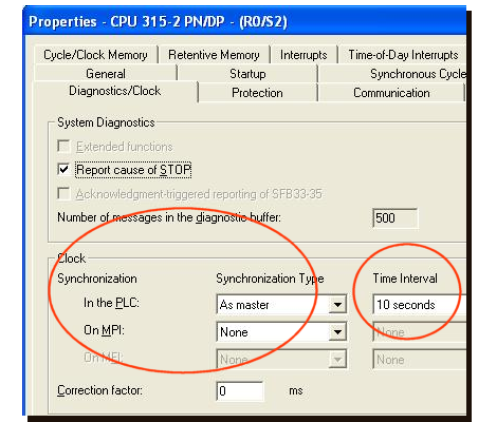
Using the Diagnostics/Clock tab, under
Clock, the CPU is configured as a master
which means that the S7-300 CPU will be the source of the
time synchronization messages in the station and that these
frames will be sent over the backplane every 10
seconds.
Time Interval
The example screenshot shows a time interval of 10 seconds. An appropriate time interval should be used based on the network configuration and the characteristics of the applications.
- Specifying a larger time interval may mean a larger time period for clocks to drift or be out of sync.
- Specifying a shorter time interval may mean additional overhead in communications between the S7-CPU, the CP 343-1 ERPC and other stations on the network.
A recommended time interval to use as a starting point is one minute (60 seconds).
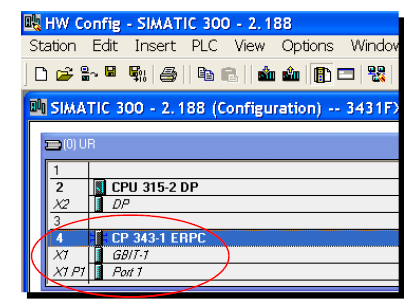
The next step is to configure the CP 343-1 ERPC to forward the time synchronization information.
Configuring the CP 343-1 ERPC
The CP 343-1 ERPC is configured to forward the time
synchronization frames to the LAN where other stations can
use that information to synchronize their time. The
time-synchronization frames are received from the S7-300
CPU via the backplane.
If there are more than one CP 343-1 ERPCs in the same
station as this S7-300, only one should be set to
Forward time of day.
Configuring the remote SIMATIC S7-300 stations
The following applies to other SIMATIC S7-300 stations
connected to the same LAN: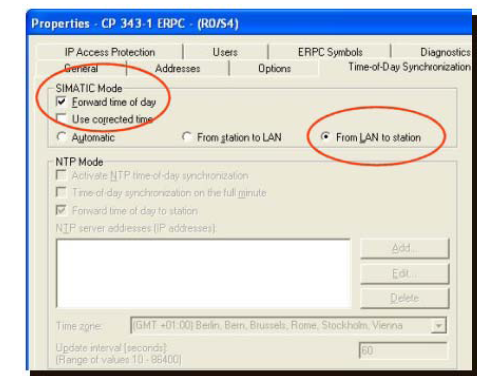
- The S7-300 CPU should be configured as a time synchronization Slave
- The CP 343-11 ERPC should be configured to Forward time of day and From LAN to station.
If there are more than one CP 343-1 ERPCs in a remote SIMATIC S7-300 station, only one should be configured to Forward time of day and From LAN to station.
NTP server time mode
In NTP mode, the CP 343-1 ERPC sends time-of-day queries at regular intervals to the configured NTP servers. Based on the replies from the NTP servers, the most reliable and accurate time is calculated and the time of day on the station is synchronized.
The advantage of NTP mode is that the time of day can be synchronized beyond the boundaries of the subnet.
For this example, the NTP server time will be selected.
- From the HW Config window, double-click CP 343-1
ERPC.
- The Properties for the CP 343-1 ERPC window
appears.
Click the Time-of-Day Synchronization tab.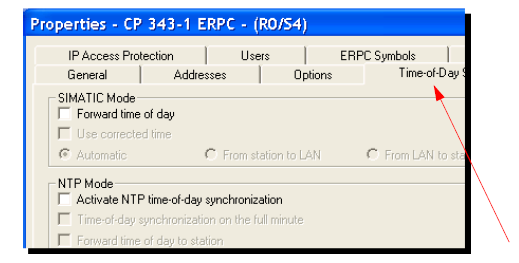
- Under NTP Mode, select
Activate NTP time-of-day
synchronization.

- Other parameters under NTP Mode
become available.
- The Activate NTP time-of-day
synchronization option lets the CPU
synchronize the time of the station using the
NTP mode. Any MMS time-of-day frames received
are then ignored.
- The Time-of-day synchronization on
the full minute option puts the time
of day onto the communication bus for a full
minute. This option is required for certain
special applications.
- By default, the Forward time of day
to station option is enabled. Some
CPUs provide the option of requesting the time
of day automatically from an NTP server. If
this option is enabled on the CPU, disable the
Forward time of day to station
option. This avoids the time of day acquired by
the CPU from the NTP server being overwritten
again by the time of day received by the CP
343-1 ERPC. Forwarding over the CP 343-1 ERPC
might result in a lower degree of
accuracy.

- The Activate NTP time-of-day
synchronization option lets the CPU
synchronize the time of the station using the
NTP mode. Any MMS time-of-day frames received
are then ignored.
- Select Forward time of day to
station, and then click
Add.
The Edit NTP Server Address window appears.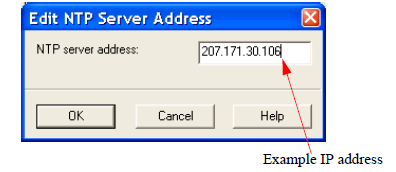
- In the NTP server address box,
type the IP address of the NTP server to contact for
the time, and then click OK. It is
assumed that your network administrator gave you the IP
addresses to use for the NTP server(s).
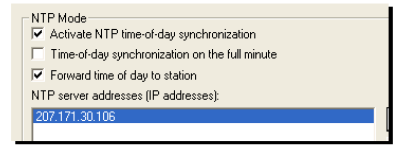
- The address is added to the box under
NTP Mode.
- The IP addresses of up to four NTP servers
can be configured. The update interval defines
the interval between time-of-day queries (in
seconds). The interval can set in a range
between 10 seconds and one day.
- In the NTP mode, Universal Time Coordinated
(UTC) is transmitted, this corresponds to
Greenwich Mean Time (GMT). By configuring the
local time zone, you can set the time offset
compared with UTC.
- The address is added to the box under
NTP Mode.
- The next step is to select the time zone in which
the CP 343-1 ERPC is located.
Click the Time zone down-arrow to display a list of time zones.
- Select the appropriate zone.
Click OK.
The next task is Installing the Enterprise Gateway software.