This page describes how to download and install the deviceWISE Asset Gateway for Vantron VT-M2M-LV product on a Vantron VT-M2M-LV gateway.
The Vantron models supported include:
- VT-M2M-LV
The following is assumed:
- You have the Vantron VT-M2M-LV gateway.
- You have an Ethernet cable.
- You have a computer, such as a laptop, that can be used to log on to the Management Portal and can have its IP address changed to allow a direct Ethernet cable connection to the Vantron VT-M2M-LV gateway at its factory default IP address.
- You have a Management Portal user ID and password
and know how to log on. You need this to download the
Asset Gateway installation file from the Management
Portal.
If you need a Management Portal account, see Creating the deviceWISE Cloud account.
If you received the installation file from your support representative, you can skip the download steps and proceed with Inserting a cellular SIM card. - You are familiar with basic Linux commands and have
root access to the Vantron VT-M2M-LV gateway.
Vantron firmware level
A required Vantron firmware update is required for your Vantron VT-M2M-LV gateway. Vantron VT-M2M-LV firmware version: 700RGA500E103_M2MLV,V3.0,VT-XOS_V3.76,Rev3.761,Release,20170120
- This version of firmware
fixes the following problems:
- When disabling the WiFi radio, the Ethernet connection would also be disabled.
- The gateway would reboot and not remember the configuration. This re-enabled the DHCP Server feature on the gateway.
- Please contact your Vantron representative for information regarding acquiring and applying this Vantron firmware update.
Follow these steps to download the Asset Gateway for the Vantron VT-M2M-LV installation file:
- Log on to the Management Portal.
- Navigate to Developer >> Resources.
- Click on the appropriate build folder(if you are not sure, pick the latest available build. For example: 25.02).
- Navigate to Vantron>>Asset_Gateway
- Select DWGateway_Install.Linux-ARM-Vantron-VT-M2M-LV.XXX.tar.gz (where XXX is the version of the Asset Gateway software you want to download) and download the file to a temporary location on the computer.
Inserting a cellular SIM card
If the Vantron VT-M2M-LV gateway will be configured for cellular connection, follow the instructions provided with the hardware to install your SIM card.
Using the Vantron VT-M2M-LV Web Interface program
- After the installation file has been downloaded, to
allow a direct Ethernet connection from the computer to
the Vantron VT-M2M-LV, temporarily change the
computer's:
- IP address for the Ethernet adapter to 192.168.0.2
- Network mask for the Ethernet adapter to
255.255.255.0.
- Connect the computer's Ethernet port to the Vantron
VT-M2M-LV ETH port using the Ethernet cable.
- From your computer, you should be able to ping
the Vantron VT-M2M-LV at IP address 192.168.0.1.
- Use a web browser to access the Vantron VT-M2M-LV
at its default IP address by entering 192.168.0.1 into
the address field of your web browser.
Note: You may be asked about a security certificate mismatch when accessing the Vantron VT-M2M-LV Web Interface for the first time. To continue, accept the mismatch and proceed. - When prompted, enter the credentials for the Web
Interface:
User Name = root
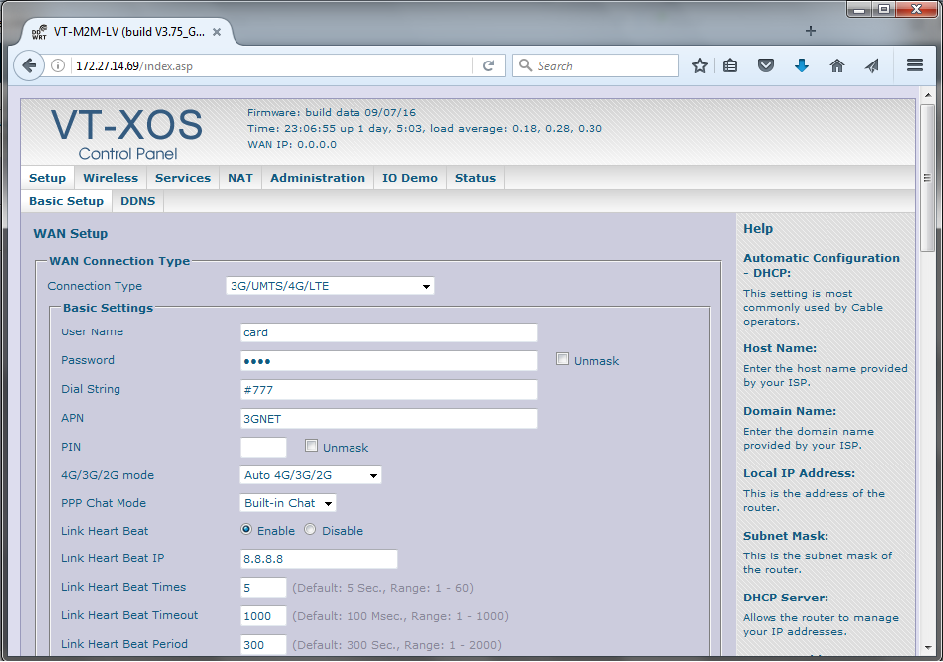
Password = root - The Vantron VT-M2M-LV Web Interface is used to
perform several Vantron VT-M2M-LV configuration tasks,
including:
- Vantron VT-M2M-LV firmware update
- IP address, subnet mask, default gateway and DNS settings
- Mobile WAN (cellular) configuration settings
- SSHd enabled
- Wireless, DHCP and other features depending
on your network environment.
Note: The Wireless (Wireless -> Basic Settings -> Wireless Mode) should be set to AP and not Disabled.
Disabling the Wireless Access Point will also disable the Ethernet port.
You can set the Wireless SSID Broadcast parameter to Disable without impacting the Ethernet port.
Updating the Vantron VT-M2M-LV firmware
The firmware of the Vantron VT-M2M-LV system must be at
level 3.752 or higher. For more information or access to
the firmware update file, contact the support group at
Vantron.
For example, the file name for firmware level 3.752 should
be vantron_vt-m2m-lv_firmware_version_3.752.zip.
Unzip the file on your local computer and extract the file.
For example, the firmware image file name for firmware
level 3.752 should be rootfs.ubi.img.
The firmware level is displayed in the Vantron VT-M2M-LV Web Interface -> Status -> Router -> Firmware Version parameter.
If you need to update the firmware, that is accomplished
using the Vantron VT-M2M-LV Web Interface ->
Administration -> Firmware
Upgrade option.
Browse for the location of the extracted firmware update
image file and then select Upgrade.
Running the install program
After configuring the Vantron VT-M2M-LV using the Web
Interface, continue with the following steps to install the
deviceWISE Asset Gateway for Vantron VT-M2M-LV
product.
- Transfer the downloaded installation file from the
computer to the /tmp directory of the
gateway, using any secure file transfer (SFTP) tool
available, such as WinSCP.
The default IP address is 192.168.0.1, the default root password is admin. - Open a command prompt (shell) on the Vantron
VT-M2M-LV gateway with a SSH client program, such as
available in PuTTY.
The default IP address is 192.168.0.1, the default root password is admin. -
Log on and then do the following:
cd /tmp gunzip DWGateway_Install.Linux-ARM-Vantron-VT-M2M-LV.XXX.tar.gz tar -xvf DWGateway_Install.Linux-ARM-Vantron-VT-M2M-LV.XXX.tar cd dwgateway_vantron_vt-m2m-lv ./dwgateway_vantron_vt-m2m-lv.install Do you wish to continue? Y A license agreement is displayed, scroll through the agreement Do you agree with the terms of this license? Y -
The install file will display information as it executes the installation and will display
...
Installation is complete.
The deviceWISE Asset Gateway for Vantron VT-M2M-LV software has been installed in the /data/dw directory and is using the default IP address of 192.168.0.1.
To uninstall or remove the product:
- You may want to do a node Back Up using the Workbench before uninstalling the product to capture the current application definition and system configuration information.
- Go to the /data directory and remove the dw directory.
If you are following the steps in the Getting Started with Gateways guide, you can continue with the tasks described in Installing the Workbench to perform the initial Asset Gateway configuration settings, and to connect the Asset Gateway to the deviceWISE Cloud.
If you are not following the steps in the Getting Started with Gateways guide and need to install the Workbench, you can continue with the tasks described in Installing the Workbench software.
If the Workbench is already installed, see The Workbench in the Gateway Developer's Guide and Reference for information on using the Workbench and the deviceWISE features that it can access.
Install any device driver or extension files that need to be applied to a node using the Packages tab. It is important to have the supported level of the device driver or extension files that match the base run time release level. If there are any questions or concerns, contact your support representative. See Packages for more information on adding device driver and extension files.