Following are the trigger components used while defining a trigger:
- The trigger's event type
- The trigger's local variables, static variables, macros and event variables
- The trigger's settings
- The trigger's actions, including the success and failure routes between actions.
When you define a trigger, you name the trigger, identify the event type (Data, Schedule, On-Demand and so on), define the event parameters, and then configure one or more actions. You will be able to Validate the trigger to check for correctness and completeness. When the trigger is saved, it is written to an internal database file on the node.
It is possible to edit, validate and save the trigger definition multiple times as the trigger's application logic is defined. Use the trigger report to generate a report of the trigger's execution to understand the trigger's execution progresses through its actions along with the actions success and failure routes.
Defining an example trigger
This example will quickly step you through the defining and execution of a sample trigger. The concept and reference information for each of the trigger components is in their specific sections, so all of the details and variations will not be covered in this quick example.
Adding actions to the Canvas
- Select and expand the node where the trigger will be defined and executed.
- Click the project where the trigger will
reside.
This example assumes that you will use the project defined in the Projects. - Click the New button at the bottom of the right
hand pane of the project's tab to start the definition
of a new trigger.
The New trigger window appears.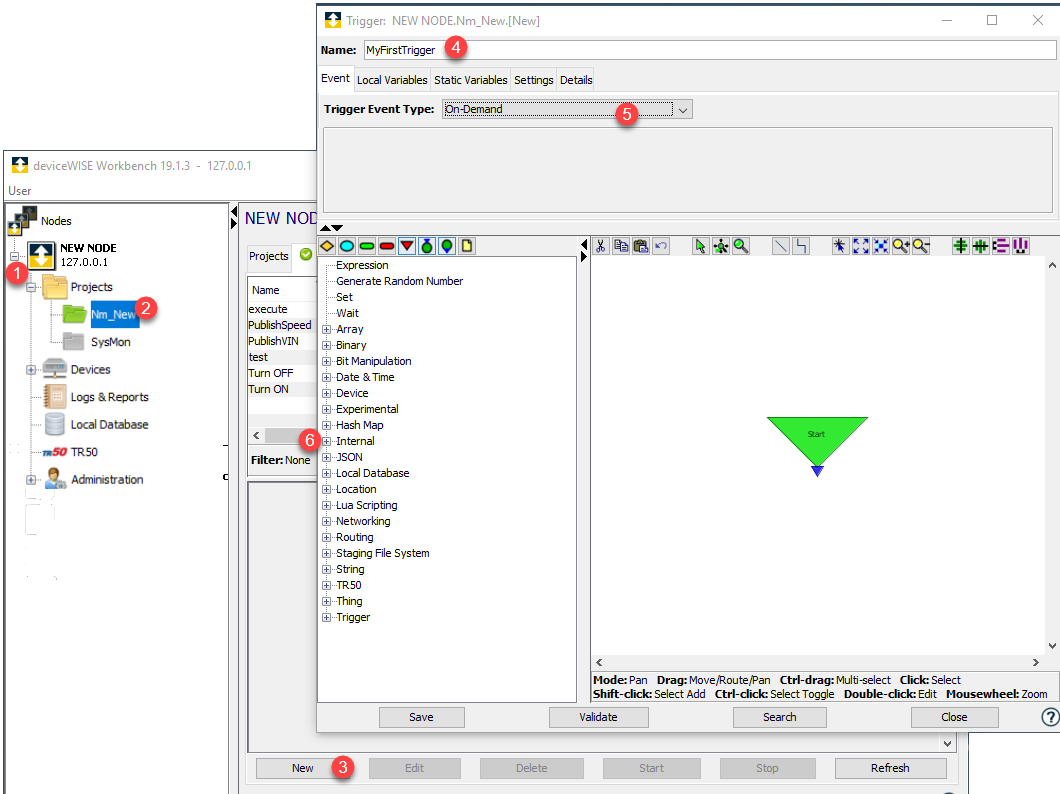
- Enter MyFirstTrigger for the Name.
- Select On-demand for the Trigger Event Type.
- From the left hand pane list of actions, expand the Internal category
- Click and place the Log Message
action in the canvas and place it below the
Start block
Alternatively, you can drag (click and hold) the action and then position its location and drop (release the mouse button).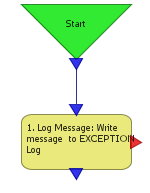
- From the left hand pane, clickWait action and position it on the Canvas below the Log Message action.
- From the left hand pane, click Log Message action and position it below the Wait action.
- From the tool bar above the left hand pane, select the End Execution (Success) action and position it on the Canvas below the second Log Message action.
- From the tool bar above the left hand pane, select the End Execution (Failure) action and position it on the Canvas to the right of the End Execution (Success) action.
- From the tool bar above the left hand pane, select the Comment block and position it on the Canvas to the right of the Start block. Enter This is a comment for my first trigger into the comment block
The Canvas should look similar to this: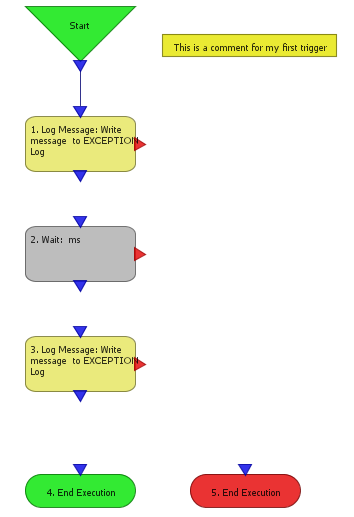
Entering the parameter details for each action
The two Log Message actions and the Wait action have
parameters that need to be entered.
To enter the parameter information for an action, double
click the action in the Canvas area.
For the actions, do the following:
- Double click the first Log Message
action.
The action's parameters details are displayed in a window. - In the Message parameter, delete
the $(Message) text and enter Hello
World.
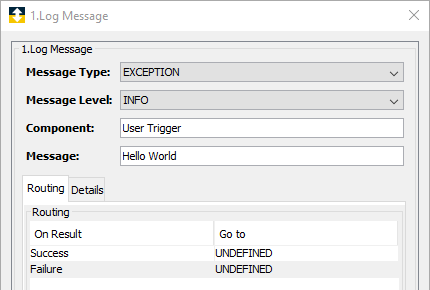
- In the Details tab, enter a comment for this action.
- Close the window by selecting the red close icon (X) in the upper right of the window.
- Double click the Wait action.
- In the Time to Wait(ms) parameter, enter 5000 for 5000 milliseconds (5 seconds).
- Close the window by selecting the red close icon (X).
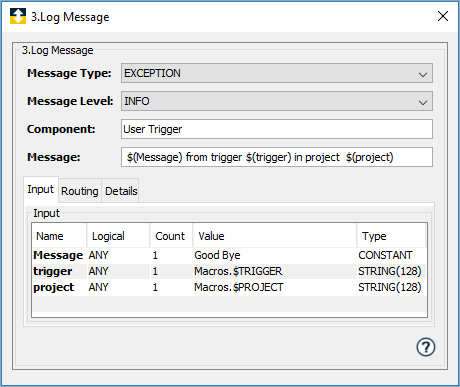
- Double click the second Log message action.
- In the Message parameter, enter
$(Message) from trigger $(trigger) in project
$(project).
Each of the substitution parameters enclosed in a $( ) becomes an input parameter on the Input tab. - Enter variables for each of the input parameters as
follows:
- Close the window by selecting the red close icon (X).
Specifying the routing for each action
The actions and blocks need routings for each of the input and output ports.
For the routings, do the following:
- Click and hold the output port at the bottom of the
Start block, then drag the mouse
cursor to the input port at the top of the first
Log Message action.
When the input port turns from blue to yellow, release the mouse button.
A route connection line should be drawn between the Start block and the first Log Message action. - Draw a connection line from the bottom of the first Log Message action to the top of the Wait action.
- Draw a connection line from the bottom of the Wait action to the top of the second Log Message action.
- Draw a connection line from the bottom of the second Log Message action to the top of the End Execution (Success) action.
- Finally draw a connection line from the red side exit of the Wait action to the top of the End Execution (Failure) action.
The completed Canvas should look similar to this: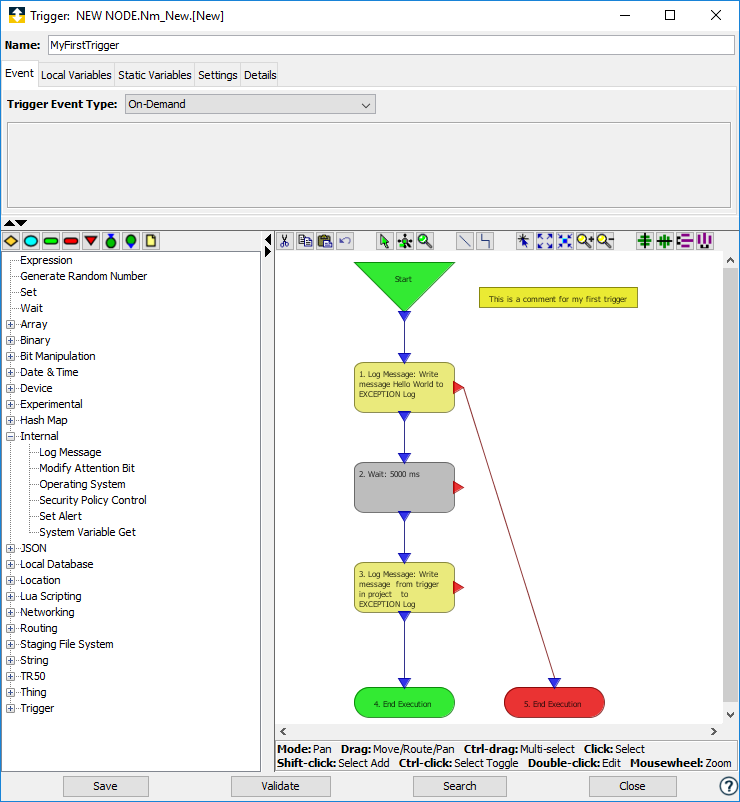
Validating and saving the trigger
- Click Validate at the
bottom of the right hand pane. The validation function
will check each action for correctness and
completeness.
If errors are found they will be displayed in a window for review and correction. Your trigger should validate successfully, if not review any errors and make the corrections. - Click Save at the
bottom of the right hand pane to save the trigger
definition and close the trigger Canvas Editor.
The trigger will be listed in the project tab's list of triggers in a Stopped state
Starting and executing the trigger
- Click the trigger you want to start.
- Do one of the following:
- Click Start or right-click on the trigger and then select the Start option.
- To run the trigger as an admin - Right click on the trigger and select Start as Admin to run the trigger as admin.In order to run a trigger as an admin, the admin needs to provide your profile necessary access. In the Policy, Elevate > Run Trigger as Admin should be enabled for you to start the trigger as an admin.
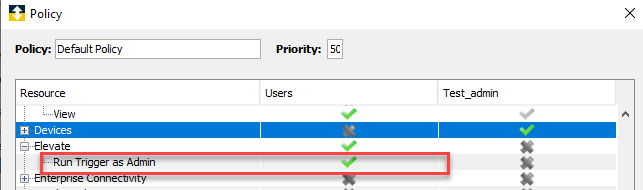
For more information on setting up the policies, see Policies tab.
- The trigger's state should be
Started and the trigger's status
should be Loaded.
If the the trigger's status is Unloaded, then the project needs to be started. To do this, right-click on the project's tab to display a pop-up menu and then select the Start option. The project should be Started and the trigger should be Started and Loaded. - Right-click on the trigger, and then select the Fire Trigger option.
- The trigger (an On-Demand event type) will be
executed.
You may see the In Progress count change to 1, and then you should see the Successes count change to 1. - Select the Refresh button a few times until you see the completion of the trigger's execution.
- You will notice the updates to the Last Triggered and Avg Time (ms) values.
- Since this trigger added messages to the Exceptions log, we will view it to see the messages.
- In the left hand pane, select the Logs & Reports icon for this node.
- In the right hand pane select the
Exceptions Log tab.
The Exceptions Log messages are displayed, including the two from this trigger: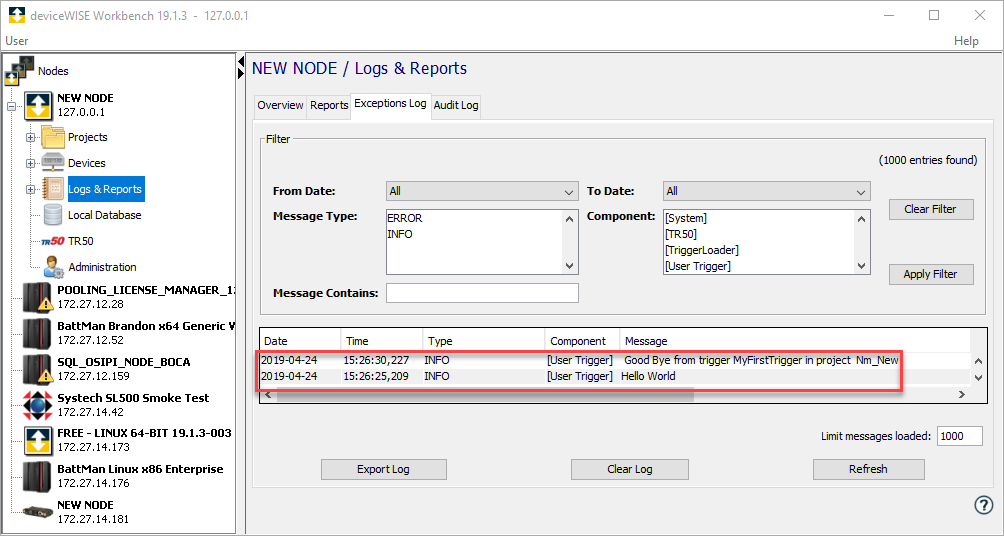
- The Audit Log can also be viewed to see the types of auditing messages that are logged by the system when events occur.
- It is possible to use the trigger List Editor instead of the trigger Canvas Editor.
- The example trigger's logic is simple, more complex triggers could include access to device variables, access to enterprise applications, interaction with the deviceWISE Cloud and much more.
That completes this example trigger. The details of each trigger component are described in the following sections.