A system variable contains runtime information about the
node. The Workbench provides a view to these internal
variables via the Administration feature
and the System Variables tab.

When troubleshooting an issue, you might be asked to record the values of specific system variables. You can also use the System Variable Get action to obtain the value of these internal variables. You can use any trigger variable including static, local, and device variables.
Adding a System Variable Get action
The System Variable Get action is
available from the Trigger window.
- From the Actions tab, click
Add .
The New Action window appears. - Expand Internal, select
System Variable Get, and then click
Add.
The right pane changes to accommodate a System Variable Get action.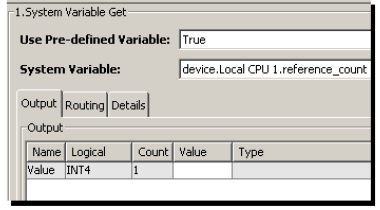
Parameter descriptions
| Parameter | Description |
|---|---|
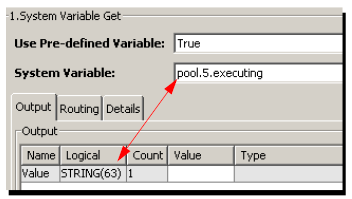
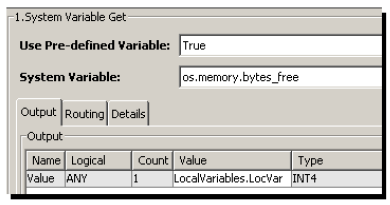
| Use Pre-defined Variable | Options are:
|
| System Variable | The name of the system variable
whose value you want to get.
|
Output tab
The Output tab is used to store the value of a system variable.
| Parameter | Description |
|---|---|
| Name | This row is used to identify the name of the variable to place the result of the action. The name will change based on the system variable selected. |
| Logical | The column specifies the data type for the variable. Depending on the system variable selected, the result could be an INT4, INT8 or a String. For a variable selected using the False option, the result will be ANY. |
| Value | The variable where the value of the system variable is returned. You can select from a list of device variables, or a user defined local or static variable. |
| Type | When you specify Value, the data type of variable is automatically added to the Type column. |
For more information about system variables, see System Variables.
Obtaining the data values for the system variable
You can create a trigger and then set the reporting
option to on to obtain the input and output data values of
the System Variable Get action in a
report. You can export the report as a file to your local
computer.
The following assumes that you have created a trigger and
set the Reporting option to
On.

For this example, an On-Demand trigger
type is specified and the LocVar local variable
was created. This local variable is where the value of the
system variable will be returned. You have also added a
System Variable Get action similar to the
following:
Once the trigger is saved, follow these steps to obtain
the input and output values for the system
variable:
- From the project tab, start the appropriate
trigger.
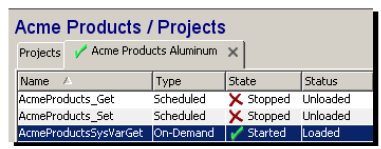
- When the state of the trigger is
Started, right-click to display its
pop-up, and then slick Fire
Trigger.
The Successes column will be incremented by one. The next step is to view the report that was generated when the trigger executed. - From the Workbench left pane, expand Logs
& Reports, and then click
Reports.
The Reports tab appears.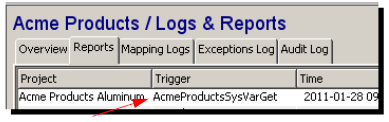
- Select the appropriate report. For this example,
AcmeProductsSysVarGet trigger.
Information about the trigger appears on the lower portion of the Reports tab.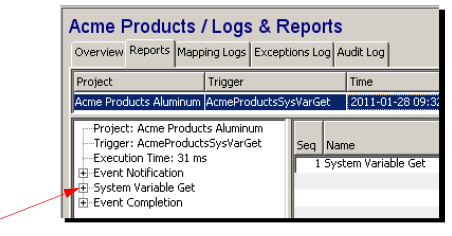
- Expand the System Variable Get
category to view the report.
The next step is to export the report so that you have a record.
- From the Reports tab, select the
report you want to export, right-click to display its
pop-up menu, select Export, and then
select Selected (the report will
contain information for the project and trigger on the
selected row).
The Export File Location window appears. - From the Look in box, change to
the location you want to export the report to, and then
click Open.
The export location is added to the Look in box. - In the File Name box, enter a name
for the report.
- Select Export.
- A message appears telling you the report was
successfully export. Select
OK.
The report is saved with a .txt extension. You can open
the report with any text editor.