Step 1 - Defining the WebSphere MQ transport
This section describes the steps to define a WebSphere MQ transport that will deliver data to a message queue. The output format will be an ASCII message. The transport must be defined before the transport map and trigger are defined in later steps.
Example WebSphere MQ transport
Follow these steps:
- From the Workbench left pane, expand the node where
you want to define the transport.
- Expand Enterprise, right-click the
Transports icon to display its pop-up
menu, and then select New.
The Transport window appears. - In the Name parameter, enter
MyWMQTransport as the name for the
transport. You will not be able to type invalid
characters. For example, spaces are not allowed.
- Next to Type, select the
down-arrow, and then select WMQ.
The Transport window changes to accommodate the parameters for a WebSphere MQ transport. The window has several tabs. Each tab and its parameters will be described separately.
Parameters tab
The Parameters tab provides parameters
that let you add communication parameters so that the
transport is able to connect to the target application
program.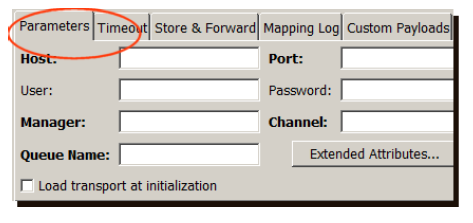
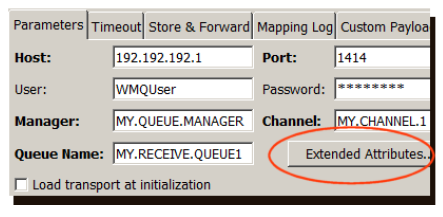
- In the Host parameter, enter the
IP address or host name of the computer where WebSphere
MQ is installed.
- In the Port parameter, enter the
TCP port that WebSphere MQ will listen on.
- In the User and
Password parameters, enter the user ID
and password to access the queue manager. This is
optional. Check with your WebSphere MQ system
administrator.
- In the Manager parameter, enter
MY.QUEUE.MANAGER as the name of the
queue manager. The name must be uppercase
letters.
- In the Channel parameter, enter
MY.CHANNEL1 as the name of the
channel.
- In the Queue Name parameter, enter
MY.RECEIVE.QUEUE1 as the name of the
data queue.The name must be uppercase letters.
- By default, a transport is down until it processes
a transaction. Select the Load transport at
initialization check box to have the transport
connect to the host as soon as the system
starts.
If you select the Extended Attributes button, an Extended Attributes window with MQMD Header Fields and PutMessage Advanced Options tabs become available. These tabs let you override some of the default WebSphere MQ extended attributes on the reply message. For more information on Extended Attributes, refer to Setting extended attributes.
Timeout tab
The Timeout tab provides values that
affect connection times.
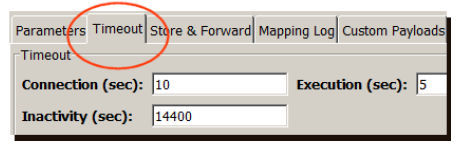
Accept the default value for each parameter. The
following describes the parameters:
- Connection (seconds)
The Connection parameter defaults to 10 seconds and specifies the length of time the system will try to connect to a target computer (where an associated WebSphere MQ queue is running). If the connection is not made in the specified time period, an error message is sent to the exception log. - Execution (seconds)
The Execution parameter defaults to 5 seconds and specifies the amount of time the transaction should wait (once the connection is made) for a WebSphere MQ transaction to complete. The time value should be the outer limit for how long you expect a typical transaction to take using a transport. - Inactivity (seconds)
The Inactivity timeout parameter specifies the maximum number of seconds of inactivity to wait before disconnecting from the queue.
A value of 0 means no timeout. A value of 14400 seconds equates to 4 hours.
Store & Forward tab
The Store & Forward tab provides
values for store and forward function for the
transport.
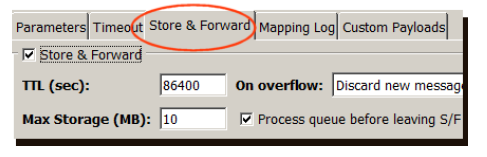
Accept the default value for each parameter. The
following describes the parameters:
- Store & Forward
Select this check box to turn on store and forward for this transport. - TTL (sec)
TTL means time-to-live, in seconds, which is how long to retain messages that are in the store and forward queue.
A value of 0 means leave the messages indefinitely. A value of 86400 seconds equates to 24 hours. - On overflow
The options are:
Discard new message - Do not accept any new messages once the store and forward queue reaches its maximum size.
Delete oldest message - Have the oldest messages discarded in a first in/first out (FIFO) manner when the store and forward queue becomes full. - Max Storage (MB)
The maximum size of the store and forward queue for this transport. The only limit is the amount of disk space on the node. - Process queue before leaving
S/F
Determines how messages are handled when the transport is able to connect to the partner.
When selected, new messages are queued to the store and forward queue and messages that were already in the queue are sent first. This maintains a first in/first out (FIFO) handling of all messages.
When not selected, new messages are sent to the partner application while messages that were already in the queue are being sent. This does not maintain a first in/first out (FIFO) handling of the messages, but results in less overhead (and better performance) while exiting store and forward mode and sending the queued messages.
Mapping Log tab
The Mapping Log tab provides values for
the transaction mapping log function of the transport,
which can make a copy of the transactions (or messages)
sent over the transport.
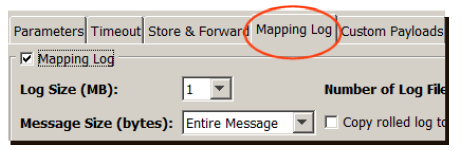
Accept the default value for each parameter. The
following describes the parameters:
- Mapping Log
Enables the mapping log function for this transport. For this example, leave this check box not selected. - Log Size (MB)
The value is the maximum size of each mapping log file for this transport. The value range may vary by product. Once a mapping log file reaches that size, a new file is created based on the Number of Log Files parameter. - Number of Log Files
The value is the number of mapping log files maintained for this transport. The value range may vary by product. When a mapping log file reaches its Log Size (MB) parameter based size, a new mapping log file is created. The file names are maintained by a sequential serializer number in the file name. For example 1, 2, 3, ...10. - Message Size (bytes)
The value is the maximum size of a transaction copied to the mapping log. For this example, accept the default to specify that the entire message be recorded. - Copy rolled log to staging
When selected, a copy of a mapping log file is made in the root directory of the Staging Browser area when the mapping log file is full and rolls over to the next mapping log file.
Custom Payloads tab
The Custom Payloads tab lets you
specify a predefined Java application program to use for
custom payload formatting.
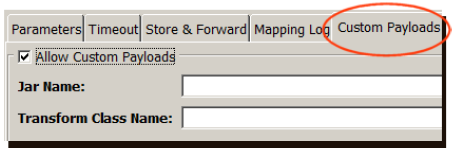
Accept the default value for each Store &
Forward parameter. The following describes the
parameters:
- Allow Custom Payloads
Enables the custom payload function for this transport. For this example, leave this check box not selected. - Jar Name
The name of the jar file on the node in the Staging Browser area. - Transform Class Name
The name of the class in the jar file handling the formatting of the outbound transactions (messages) for this transport.
Validate and Save the transport
Now that you have entered an appropriate value for each
parameter, you must validate the connection, and then save
your work.
- From the bottom of the Create Transport window,
select Validate.
A connection is made to the queue manager. A message will indicate if the validation was successful or if there was an error. - Select OK to clear the validation
message and then select Save.
The new transport definition is saved to node and is listed on the Transports tab.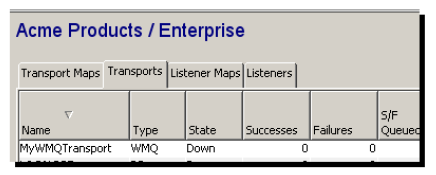
The next step is to build the transport map and define
map variables. Go to
Step 2 - Defining a transport map for the WebSphere MQ
transport.