Step 3 - Defining a transport map for the TCP transport
This section describes the steps to define a transport map for the TCP transport you created in Step 2.
A transport map defines the parameters that come from a trigger (your application) and the mapping or formatting of those parameters to fields in the message that gets sent to the partner TCP application.
The transport map will be referenced in your trigger that will be defined in the later steps.
Before you begin to define the transport map, the following is assumed:
- The TCP transport was defined (Step 2).
- The Workbench is started and you have logged on.
Example TCP transport map
For this example, a simple transport map will be defined
to describe the data sent over the transport to the partner
TCP application.
- From the Workbench left pane, expand the node where
you want to define the transport map.

- Expand Enterprise, right-click the
Transport Maps icon to display its
pop-up menu, and then select
New.
The Transport Map window similar to the following appears.
- In the Name parameter, enter
MyFirstTransportMap as the unique name
for the transport map. A transport map name can be up
to 32 characters and include letters, numbers, and the
underscore character. Spaces are allowed. You will not
be able to type invalid characters.
- To filter the list of transports to a specific
type, use the Transport Type
down-arrow, and then select TCP.
Only TCP transports that are defined on the current node will be listed in the Transport Name drop-down list. - From the Transport Name drop-down list, select the
transport you created in Step
2- Defining the TCP transport. For this example,
MyTCPTransport.
The following shows the To Enterprise section of the Transport Map window when a TCP transport is selected.
- Now that you have specified the transport, you can
add the payload.The first step when adding a payload is
to identify the format of the message.
- Under the To Enterprise section,
select the Format down-arrow, and then
select ASCII.

The Field Delimiter and Array Delimiter boxes become available. - The Field Delimiter box defaults
to a comma that is used to separate each ASCII string
element in a message. Accept the default.
The Array Delimiter box defaults to a bar ( | ) character that is used to separate an array of numbers. Accept the default.
After you specify ASCII as the format, you must create the map variables, and then specify the ASCII payload values. - Go to the Input tab at the top of
the Transport Map window.
- Select Add.
The New Item window appears.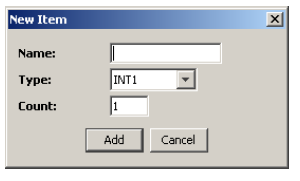
- In the Name parameter, enter
CompleteMessage as the name for the
map variable. The name can be up to 32 characters and
include letters, numbers, underscore, dash characters,
and spaces. Special characters such as < > '
(single quotation) " (double quotation) are not
allowed.
- Select the Type down-arrow to
display a list of supported data types, and select the
data type that you want assigned to the name. For this
example, select STRING.
The New Item window changes to accommodate the string data type.
- In the Length box, enter 16.
- In the Count box, accept the
default of 1. The value specifies the dimension of the
map variable (for this example a scalar). To define an
array instead of a scalar, you would enter the count of
elements in the array.
- Select Add.
A row appears on the Input tab with the information you added.
You can repeat the steps to add all required map variables appropriately. For this example, there is only one map variable.
The next step is to create the payload.You must associate the map variable from the Input tab with a data item (or macro if appropriate) for the payload. - Go to the To Enterprise section of
the Transport Map window.
- Select Add.
The first row in the table becomes active.
- Under Field, select the column to
display a drop-down list, and then select the
appropriate map variable. For this example,
CompleteMessage.
The completed To Enterprise section will look similar to this:
- After you complete the transport map, select
Validate.
A window will appear that shows a representation of the payload.
- Select OK, and then select
Save.
The new transport map is saved to the node and listed on the Transport Maps tab.
The final step is to define a trigger and use the transport map in a Transaction action.