Starting the Workbench for the first time
The following steps describes starting and connecting the Workbench to your Gateways:
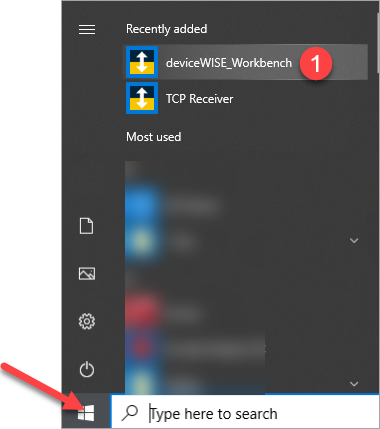
- From the Windows Start menu,
select All
Programs > deviceWISE > Workbench > Workbench.
Alternatively, double-click the Workbench icon on your
desktop.
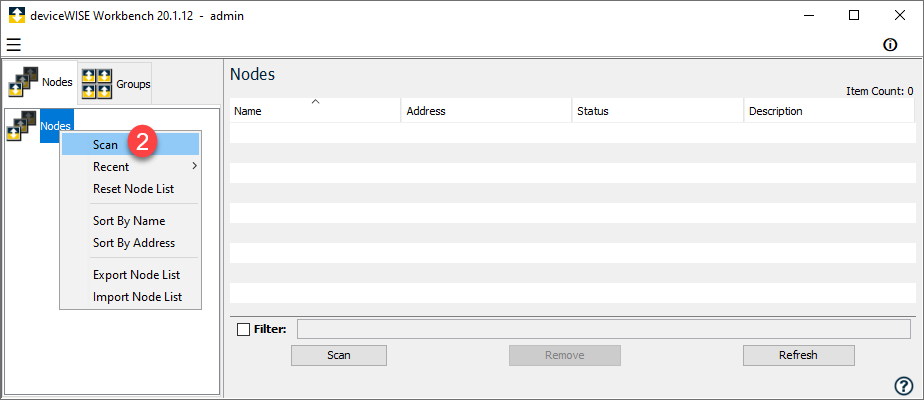
The Workbench appears.The first time you log on to the Workbench, if no nodes (Gateways) are detected you will be shown the Configuration Wizard which will guide you through adding local nodes and licenses. You can scan for more nodes using the Nodes panel. - Right-click Nodes, and
then select Scan to scan for nodes.
Node Scanner window appears, allowing different ways for the Workbench to connect to (or scan) the Asset Gateway. - Click Network.
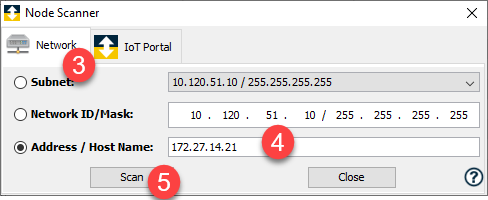
The Network panel allows different options for scanning over a Local Area Network (LAN). - Select Address / Host Name and enter the IP address of your Asset Gateway.
- Click Scan.
The computer that is running the Workbench must be on the same subnet as the Asset Gateway that you want to connect to for the initial configuration. For the Asset Gateway installation, you may have temporarily changed the IP address of the computer used during the installation steps.
You may also be working with an
Asset Gateway that has already been assigned an IP address
that is different than their default value. For more
information on the the default IP addresses for the Asset
Gateway hardware and the installation steps, see Installing an Asset
Gateway.
When the Asset Gateway is located, an icon that
represents the Asset Gateway appears in the left
pane Nodes list in the Workbench. Expand a node by clicking its  , which
displays the features available on that node.
, which
displays the features available on that node.