This page describes how to download and install the deviceWISE Enterprise Gateway for Mitsubishi Q10WCPU-W1 (referred to as WinCPU) system.
The deviceWISE Enterprise Gateway for WinCPU requires:
- Approximately 141 megabytes (MB) of disk space.
- A minimum 75 megabytes (MB) of available
memory.
Memory utilization greatly varies based on the requirements of the application, the number of concurrently executing triggers, the number of transport maps, and the size of the data being moved from and to the Enterprise Gateway and the end point enterprise application.
Prerequisites
The following is assumed:
- You have a Management Portal user ID and password
and know how to log on. You need this to download the
Enterprise Gateway install files from the Management
Portal.
If you need a Management Portal account, see Creating the deviceWISE Cloud account.
If you received the install files from your Telit representative, you can skip the download steps and proceed with Running the install program. - You have completed the hardware setup and configuration procedures for the WinCPU system as documented in the Mitsubishi information that came with the WinCPU.
- You have the permissions required to install software on the WinCPU system. This will require a Windows user account with administrator access.
Obtaining the Enterprise Gateway for WinCPU install program
Follow these steps to download the Enterprise Gateway for WinCPU install program:
- Log on to the Management Portal, and then select
Developer.
The Developer menu appears. - From the Developer menu, select
Resources.
- From under Index of files, select
the appropriate build (if you are not sure, pick the
latest available build).
- Select Mitsubishi.
- Select WINCPU.
- Select Enterprise_Gateway.
- Select DWEnterprise_Install.WinCPU.XXX.exe (where XXX is the version of the Enterprise Gateway software you want to download), and then download the file to a temporary location on your computer.
Running the install program
Follow these steps to run the install program:
- From the Windows computer, go to the folder where you downloaded the DWEnterprise_Install.WinCPU.version.exe file.
- Double-click the file to execute the install program.
- A security warning such as The publisher could
not verified. Are you sure you want to run this
software? might appear; if so, select
Run to proceed with the
installation.
A welcome screen similar to the following appears.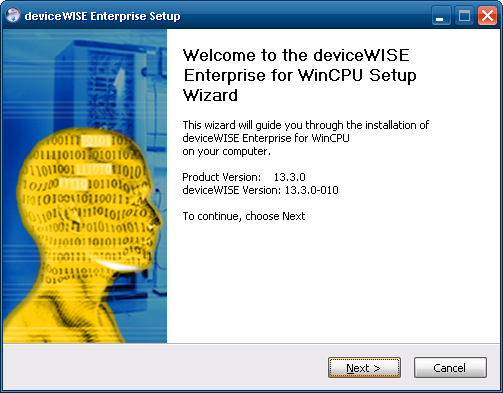
- Select Next.
A license agreement screen appears. - Accept the terms of the license agreement, and then
select Next.
The Choose Install Location screen appears.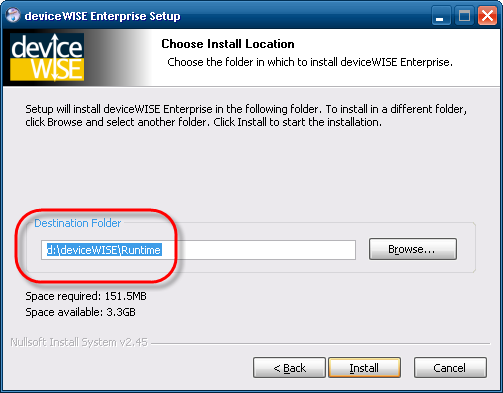
-
Accept the default destination drive and folder, and then select Install. If you want to change to another folder, use the Browse button.
Destination drive and Enhanced Write Filter Function (EWF)
Refer to the Mitsubishi Q10WCPU-W1 documentation for the description of the EWF function.
The default and recommended installation destination drive is d:.
Leave the default destination folder of \deviceWISE\Runtime\. - When the installation is complete, select Next.
- The Completing the deviceWISE Setup Wizard screen appears, select Finish.
Starting, stopping or uninstalling the Enterprise Gateway software
The Enterprise Gateway for WinCPU software runs as a Windows service and will normally be started when Windows is started.
However, should you need to start or stop the main Enterprise Gateway components, use the following:
- From the Windows Start menu,
select All Programs >
deviceWISE >
Runtime >
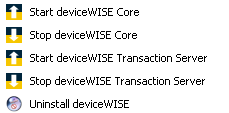
- Select the appropriate action as shown.
For the uninstall option:
- You may want to do a node Back Up before uninstalling the product to capture the current application definition and system configuration information.
- The product files will be removed, but files that
contain application definition and system configuration
information will not be removed.
These files and folders are in the location chosen for the installation, typically d:\deviceWISE\Runtime. You can delete the runtime folder to completely remove the remaining files.
Windows firewall configuration
The deviceWISE Enterprise Gateway for WinCPU might need Windows permission to access enterprise applications and to connect with the Workbench.
The Windows firewall configuration varies with the different versions of Windows, but the main topic to discuss and configure with your network administrator is allowing the deviceWISE Core (dwcore) and the deviceWISE Transaction Server (dwrun) to communicate through the Windows firewall.
Installing the Workbench on a WinCPU
Since the WinCPU system runs a version of the Windows Embedded Standard 2009 operating system, the Workbench can be installed on the WinCPU.
For the Workbench installation instructions, see Installing the Workbench software.
The default destination drive for the Workbench install program is c:. The destination drive chosen should be the same as the destination drive chosen for the deviceWISE runtime and should take into account the EWF function configured for the WinCPU.
Connecting to the Enterprise Gateway using the Workbench
After the Enterprise Gateway for WinCPU is installed, you can connect to it using the Workbench to begin the configuration and application development tasks. For information on installing the Workbench and connecting to nodes, see Installing the Workbench software.
If the Workbench is already installed, see The Workbench in the Gateway Developer's Guide and Reference for information on using the Workbench and the deviceWISE features that it can access.