Scanning for local or remote nodes
Before the Workbench can connect to a node, it must first scan for available nodes. Scanning allows the Workbench to discover nodes that are either on the local network (LAN) or remotely through the deviceWISE Cloud. The nodes that are found are shown in the Nodes List. This list will be empty the first time the Workbench is started after it is installed. To connect to nodes and access its features, the Workbench must first scan:
- For local nodes, this is usually done using the node's IP address for nodes that are on the same LAN as the computer running the Workbench.
- For remote nodes, this is done using the
Workbench's TR50 connection to the deviceWISE Cloud, and then
the IoT Portal's TR50 connection to the remote
node.
- The Node Scanner window can remain open up while scanning for nodes multiple times or while you do other work in the Workbench.
How the Workbench accesses node resources
Each node stores its configuration settings and application definitions in an internal database on the node itself.
The Workbench uses the Scan function to locate nodes on the network and the Connect function to log in to a node using the credentials provided by the user.
When the configurations setting or application definitions are modified, the changes are written directly to the node's internal database.
The Workbench does not maintain an offline copy of the node configuration or definitions on the computer running the Workbench.
Runtime products provide Backing up and Restoring a node's configuration and item definition Exporting a project or trigger features which are described in their sections.
To scan for a node using its IP address, do the following:
- From the Workbench left pane, select
Nodes at the top of the left hand
pane, then right click to display its pop-up menu and
select Scan.
Or alternatively, select the Scan button at the bottom of the right hand pane.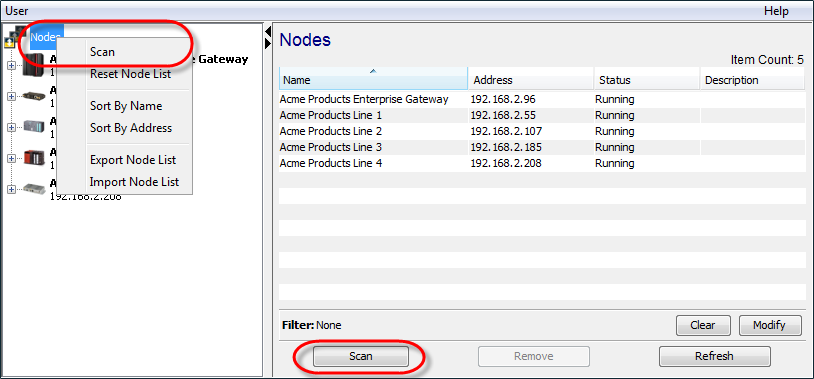
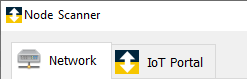
The Node Scanner window is displayed, allowing different ways for the Workbench to connect to (or scan) the node - Click Network.
The associated panel allows different options for scanning over a Local Area Network (LAN). - Select Address / Host Name, enter the
IP address of your node
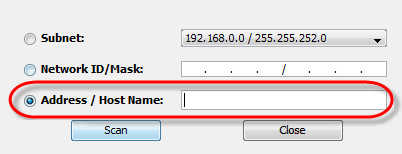
- Click Scan
The node's icon will be added to the Nodes list. If the node's icon is not added to the Nodes list, check the following possible causes:
- Make sure you entered a correct IP address.
- Make sure the node is powered on and connected to
the network.
You should be able to use the Workbench computer's ping command to successfully ping the node using its IP address. - Make sure the runtime processes are started on the node.
- Make sure the node has its operating system firewall configured to allow the Workbench to access the runtime processes.
To scan for a node using its host name, follow the same steps as above for an IP address, but use the host name instead. The host name must be able to be resolved by a DNS server for the computer running the Workbench.
Specifying an alternative port number
The Workbench, by default, uses port number 4012 over
TCP when connecting to a node. While not common, it is
possible to change the TCP port number that a node will use
by specifying a different port number in the node's
property file.
If there is a node that is configured to use port number
different from the default port 4012, the Workbench scan
option for Address / Host Name can be used
to specify the alternative port number.
For example, if there is a node that can not use the
default port 4012, you would change that node's
../dwcore/dwcore.properties file to have a different port
for this statement:
listener.2=Private/0.0.0.0:4012/SECUREIn the Workbench Address / Host Name parameter, you would add the alternative port number when scanning for that node. For example: 192.168.2.208:4019.
You can scan for multiple nodes at once by using the
Subnet option. The Network ID
portion of the input field and the Subnet Mask portion is
used to identify the subnet to scan.
For example: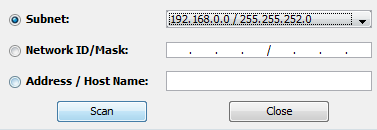
The Workbench will scan for all nodes within the subnet and add each node found to the Nodes list.
After you have entered a value and performed a scan using the Subnet field, the value is saved and is available as a menu option in the selection drop down list for the Subnet field.
If your nodes are connected to the deviceWISE Cloud, you can scan for nodes using the deviceWISE Cloud and its TR50 connection to the node. The scan over the TR50 connection is used instead of the normal Workbench scan which uses TCP in the LAN environment. This is very useful in remote access scenarios where you need to use the Workbench to access nodes that are not attached to your local network. The nodes that you need to access could be attached to a company LAN in a remote location or they could be in the field with no LAN access, but access to the deviceWISE Cloud using a cellular modem. The complexity and variability of the connection is handled by the deviceWISE Cloud and the Workbench.
To scan for a node over TR50, do the following:
- From the Workbench left pane, select
Nodes at the top of the left hand
pane, then right click to display its pop-up menu and
select Scan.
Or alternatively, select the Scan button at the bottom of the right hand pane.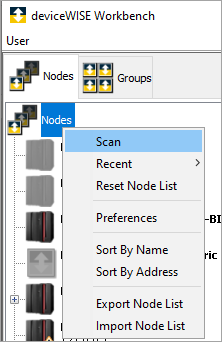
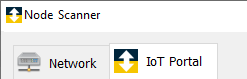
- The Node Scanner window is displayed, allowing different ways for the Workbench to connect to (or scan) the nodes.
- Select the IoT Portal tab.
- If you are not currently logged on to the IoT
Portal from the Workbench, a panel is displayed for
your credentials.
This is the IoT Portal endpoint information (for example: api.devicewise.com or api-dev.devicewise.com) and your Management Portal account information (email address and password).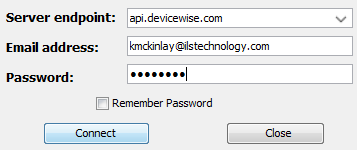
- If your account is a member of multiple organizations, a dialog will show to allow you to select the organization you wish to connect to.
- A list of the currently connected nodes for the
organization is displayed. For example:
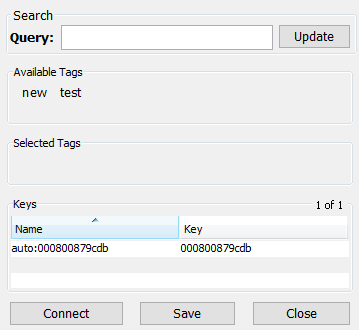
The query field allows searching for Things by various attributes. For more information on options, see the Using Search.The result list is narrowed by selecting tags that have been set. Only nodes having those tags will be shown.- To connect to a single node, select the node and click Connect.
- To add multiple nodes to the Workbench in one step, select them and click Add. Note this does not connect to each nodes but allows for adding a larger number of nodes simultaneously. Each node can then be connected to as normal via the navigation tree.
- Once you are done adding node, click Close.
- The Workbench will connect to the node using the
deviceWISE Cloud and the TR50 connection.
The node's thing key (in this example its MAC address) is displayed under the node icon instead of an IP address. - Click Save to save the parameters of a TR50 scan to a Scan Group visible on the Groups tab. The nodes in this group will be the nodes that match the query and tag parameters. This list will refresh dynamically if node tags or other attributes change.
Workbench access over TR50
When the Workbench connects to a node over TR50, it periodically sends API calls (tunnel history) to the IoT Portal to retrieve information about the underlying tunnel used for the remote access.