In addition to ASCII delimited messages, XML, and
freeform text payloads, JMS-based transports support a map
message format.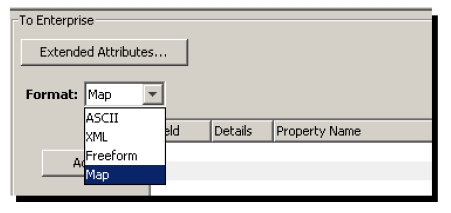
A map message is comprised of name value pairs that have a type associated with them. If your enterprise application program uses map messages, you will want to add a map message format to the transport map. Unlike an XML format (which is always a String), specifying Map as the format will allow you to specify a data type for the variable such as integer, String, float, and so forth.
Follow these steps:
- On the Transport Map window, click the
Transport down-arrow, and then select
the appropriate transport. The map message format is
only available for JMS-based transports.
- Using the Input tab, create the
map variables. The completed Input tab
might look like this:

The next step is to create the payload. You will associate a Property Name with an input variable or macro.Arrays: You cannot use arrays with a map message. Input map variables must have a count of 1. The Transaction Server will not allow a transport map definition with Input map variables with a count greater than one when the format is Map.
- Go to the To Enterprise section,
click the Format down-arrow, and then
select Map.
- Click Add.
The first row in the table becomes active.
The values from these columns will appear in the map message:
Field — This column provides a list of the map variables from the Input tab. When the transport map is specified for use by the trigger, the map variable is associated with a PLC device variable or constant value.
Details — A list of supported host initiated data types that you want associated with the map variable that appears in the Field column.
PropertyName — A name you specify as the identifier that appears in the map message. The Map format requires a Property Name to send the information to the JMS server in JMS Map Message format in name value pairs. - Click the row under the Field
column.
A list appears.
- Select the map variable you created in step 2 (the
Input tab). For this example,
VIN.
- Accept the default value of String for the
Details column.
- Double-click the row under Property
Name, and then type the name that you want to
associate with VIN. For this example,
VehicleNumber.
- Click Add.
A row is inserted under the first row. - Repeat steps 6 through 8 for the remaining map
variable. For this example, colorCode.
Set the data type as an integer and Property
Name as ColorCode.
The next step is to add a timestamp macro. - Click Add.
A row is inserted under the second row.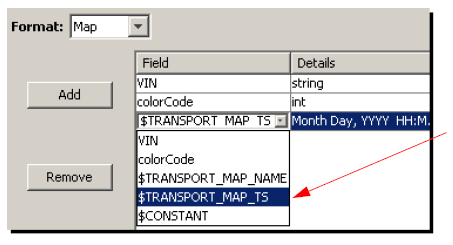
- In the new row, click the Field
column, and then select
$TRANSPORT_MAP_TS.
When using the $TRANSPORT_MAP_TS macro, the time is expressed as a String.
The completed To Enterprise section might look like this: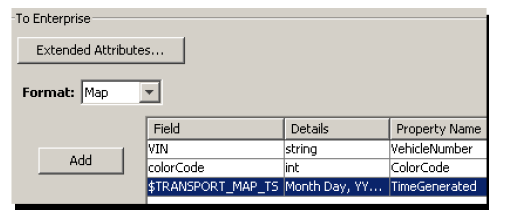
- Click Validate.
A window appears with a sample of the map message output.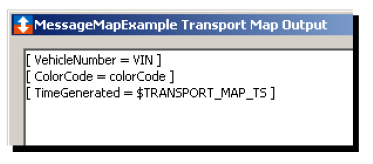
- Click Save.
The name of the transport map is added to the Transport Maps window.
Related Topics
Defining an ASCII message payload
Creating a payload of freeform text