You can specify XML as the output format. When the
trigger executes, the values from the map variables and
constants are specified as XML and sent to the endpoint
enterprise application program such as a WebSphere MQ
queue.
Follow these steps:
- On the Transport Map window, under the To
Enterprise section, click the
Format down-arrow, and then select
XML.
When XML is selected as the format, the payload is UTF-8 encoded.
The To Enterprise section changes to accommodate Field, Details, and PropertyName columns.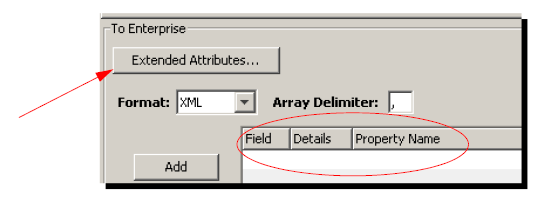
The Extended Attributes button is also available because a WebSphere MQ transport was specified. The next step is to create the map variables using the Input tab. - Go to the Input tab at the top of
the Transport Map window.
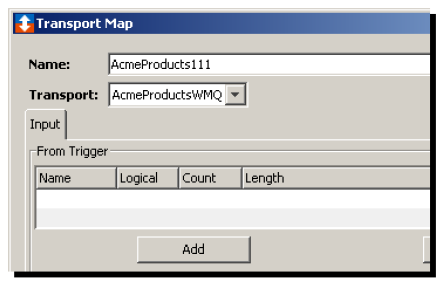
- Click Add.
The New Item window appears. - Fill in the parameters as appropriate.
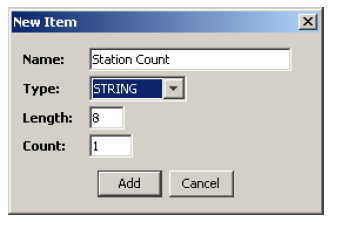
For this example, a STRING is assigned because the IT department wants to track the number of engines progressing in the production line. You can accept the default value of 8 for the length of the string or type a different length. - Click Add.
The information is added as a row under the Input tab.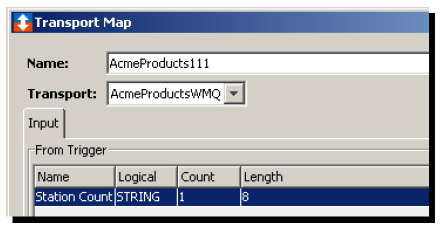
Repeat the steps to add the required map variables to the Input tab. The final Input tab might look like this: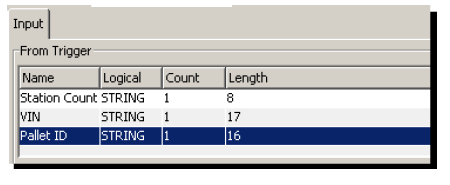
The next step is to create the payload. You must associate the map variables from the Input tab with data types and macros for the payload. - Go to the To Enterprise section,
and then click Add.
The first row in the table becomes active.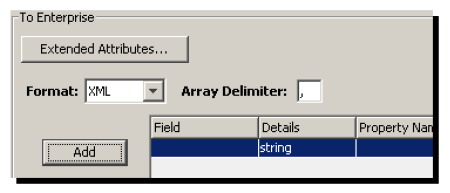
The values from these columns will appear in the XML:
Field — This column provides a list of the map variables from the Input tab. When the transport map is specified for use by the trigger, the map variable is associated with a PLC device variable or constant value.
Details — A list of supported host initiated data types that you want associated with the map variable that appears in the Field column.
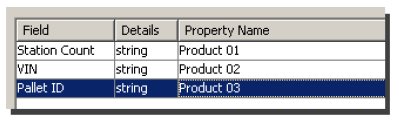
PropertyName — A name you specify as the identifier that appears in the XML. - Click the row under the Field
column.
A list appears.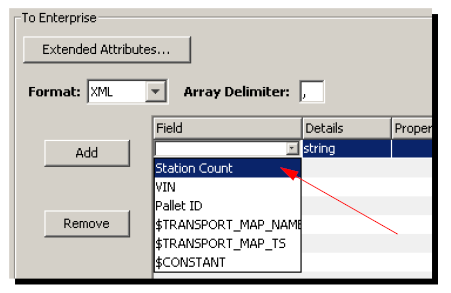
- Select the map variable you created in step 2 (the
Input tab). For this example,
StationCount.
- Accept the default value of string for the
Details column. Actually, you can
ignore the Details column as all data
written in XML format is represented as a string.
- Double-click the row under
PropertyName.
A box appears where you can type a name that will be associated with Station Count. For this example, Product 01.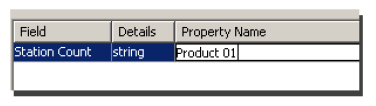
The name can include letters, numbers, underscore, dash characters, and spaces. Special characters such as < (less than) > (greater than) ' (single quotation) " (double quotation) are not allowed. - Click Add.
A row is inserted under the first row. - Repeat steps 7 through 10 for the remaining two map
variables. For this example, VIN and Pallet ID.
For this example, the next step is to add a macro that will identify the transport map name in the XML. - Click Add.
A row is inserted under the third row. - In the new row, click the Field
column, and then use the down-arrow to display the
list.
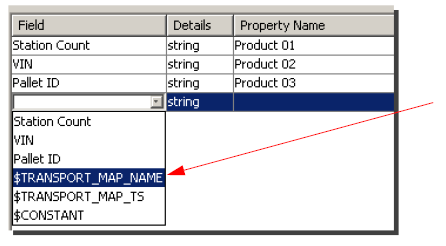
- Select
*$TRANSPORT_MAP_NAME*.
This macro places the name of the transport map within an <Item> tag in the XML. - Accept the default value of string
for the Details column.
- Double-click the row under
PropertyName.
A box appears where you can type a name. This name will appear in the XML as an identifier for the data item. For this example, Product 04.
The next step (and the last item in the example payload table) will be a macro that adds a constant (string value) to the XML. - Click Add.
A row is inserted under the fourth row. - In the new row, click the Field
column, and then use the down-arrow to display the
list.
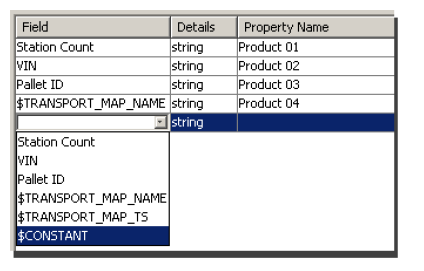
- Select $CONSTANT.
The Constant window appears.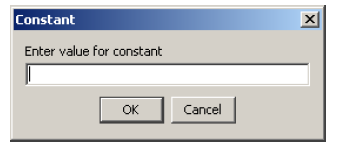
- Type the text that you want to appear in the XML,
and then click OK.
The string value is added to the Details column. For this example HotMetal 101. - Double-click the row under
PropertyName.
A box appears where you can type a name. For this example, Product 05.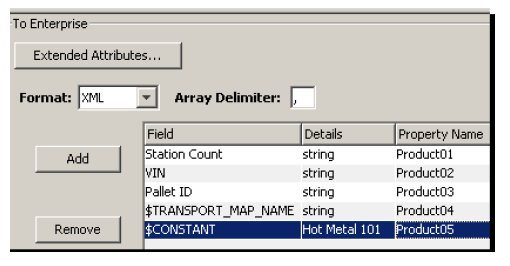
- Click Validate.
A window appears with a sample of the XML output.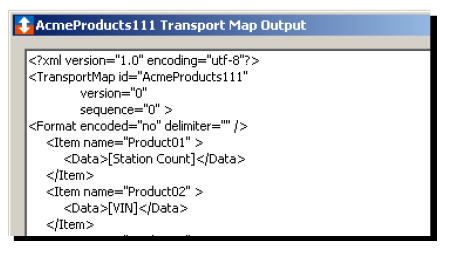
- Click OK to close the window. For
a description of the XML output, click Example
XML output.
- If the XML meets your approval, click Save.
The name of the transport map is added to the Transport Maps window. The transport map is now available to be used by a trigger.
Related Topics
Defining an ASCII message payload
Creating a payload of freeform text
Adding a map message as the payload