For OneEdge the Org is created by an internal process and the devices are onboarded to the deviceWISE Cloud. If you are not able to find your device (IMEI), send an email to ts-oneedge@telit.com. Since the security credentials are shared between the devices and the server in a secured way, you cannot create an OneEdge LwM2M Thing.
To create an LWM2M thing, do the following:
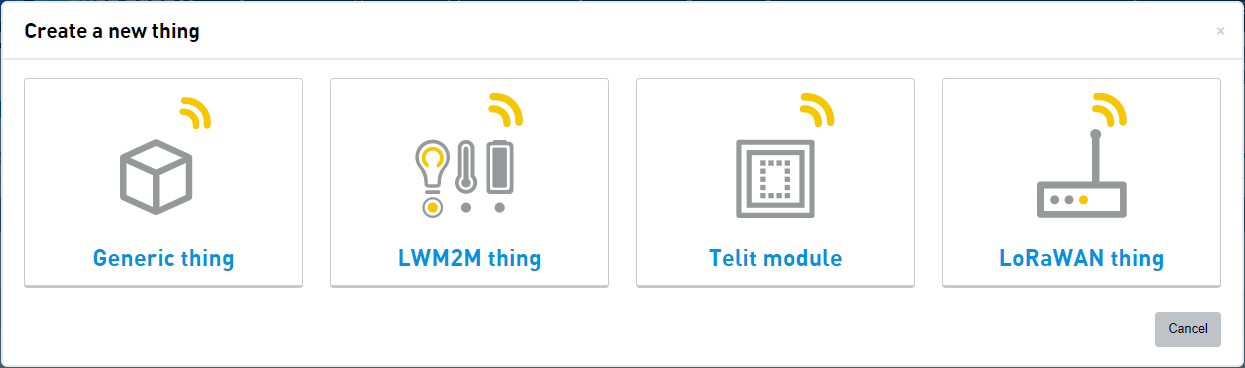
- On the Things main screen, click New thing.

Create a new thing screen appears. - Click on the LWM2M thing.
A screen with a list of Thing definition appears. - Do one of the following:
 When you select a Thing definition, it shows all theAttributes , Thing Properties , Thing Alarms, Tunnels associated with the Thing definitions . If the Attributes and Thing Properties are auto-defined, you will notice that as shown in the image below.
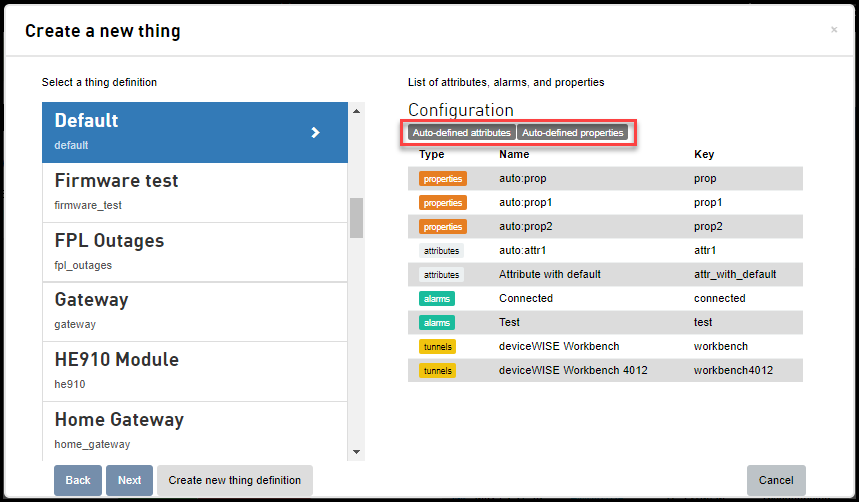
- Click Create new thing definition. For more information on creating thing definition, see Creating a Thing definition.
- Click Next.
Create a new thing screen appears. - Under LWM2M
- Enter the LWM2M client Endpoint. The endpoint is a unique identifier assigned to an LWM2M device.
- Click Device
profile drop-down and select a
Device profile. For more information on the Device profile, see Device Profiles.
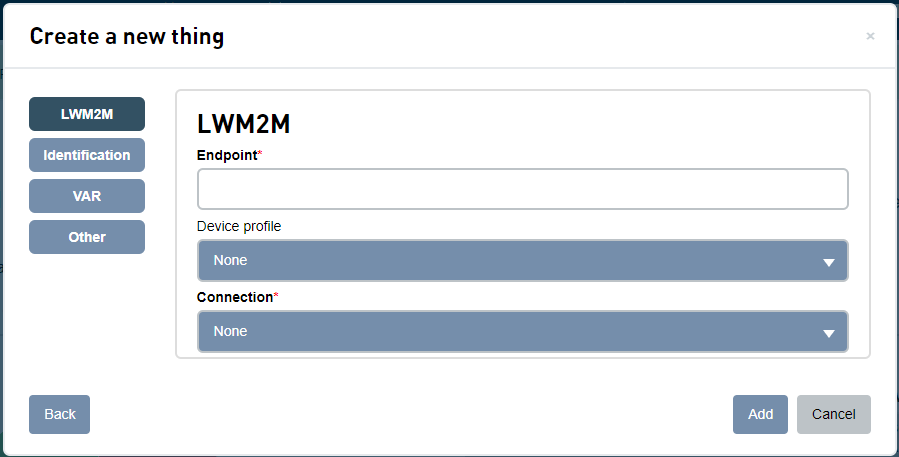
- Click Connection drop-down and select a connection.
- Bootstrap with DTLS or Server with DTLS - This option enables connection to the Bootstrap or Server with security. When this option is set, additional fields appear. The fields include Identity and Pre-shared key.
- Bootstrap without DTLS or Server without DTLS - This option enables connection to Bootstrap or Server without security.
- Click Identification
- Key - An ASCII unique
identifier that must be globally unique within
the organization. The key for the thing. A key
is an identifier that must be globally unique
within the organization. Use one of the
hardware identifiers, such as an IMEI, ICCID,
MAC address, and so on.
For more information on Thing Key formats and limitations, see Field Formats and Limitations. - Name - Enter the name of the Thing.
- Identifier - For Things that are Connections, you specify a mobile identifier from the identifier drop-down. The options include ICCID (Integrated Circuit Card Identifier) or ESN (Electronic Serial Number), IMEI, MEID or IMSI. This enables the M2M Service to Connect Device Provisioning systems (CDPs) to retrieve provisioning information and data usage from telecommunications carriers.
To add more than one identifier, click the plus sign adjacent to the New identifier. - Tags - It is used to filter the display of Things. Select any of the existing tags or enter new tags. For more information on tags, see Using Tags
- Security tags - It is used to limit view access or update access to things. Select any of the existing tags, or enter new tags. For more information on Security tags, see Using Security Tags.
- Control tags - It is used to control the behavior of the Things. For more information on Control tags, see Using Control Tags
- Key - An ASCII unique
identifier that must be globally unique within
the organization. The key for the thing. A key
is an identifier that must be globally unique
within the organization. Use one of the
hardware identifiers, such as an IMEI, ICCID,
MAC address, and so on.
- Click VAR
- Click Billing plan code drop-down and select a Billing plan code. For more information on the Billing plan code, see Billing plans
- Click VAS package code drop-down and select a VAS package code. For more information on the VAS package code, see VAS packages
- Click Other
- Enter an optional description of the thing in the Description field
- Selecting the Location enabled check box enables the location related features for the thing.
- Enter the IP address to reach this thing from the gateway in the Tunnel actual host field. The Actual host is the IP address of the endpoint.
- Enter the IP address assigned to it when tunnel gets opened locally in the Tunnel virtual host field. The virtual host is the IP address of the local host on which the tunnel manager listens for active connections
- Click SMS
provider drop-down and select an SMS provider.
- Click Add